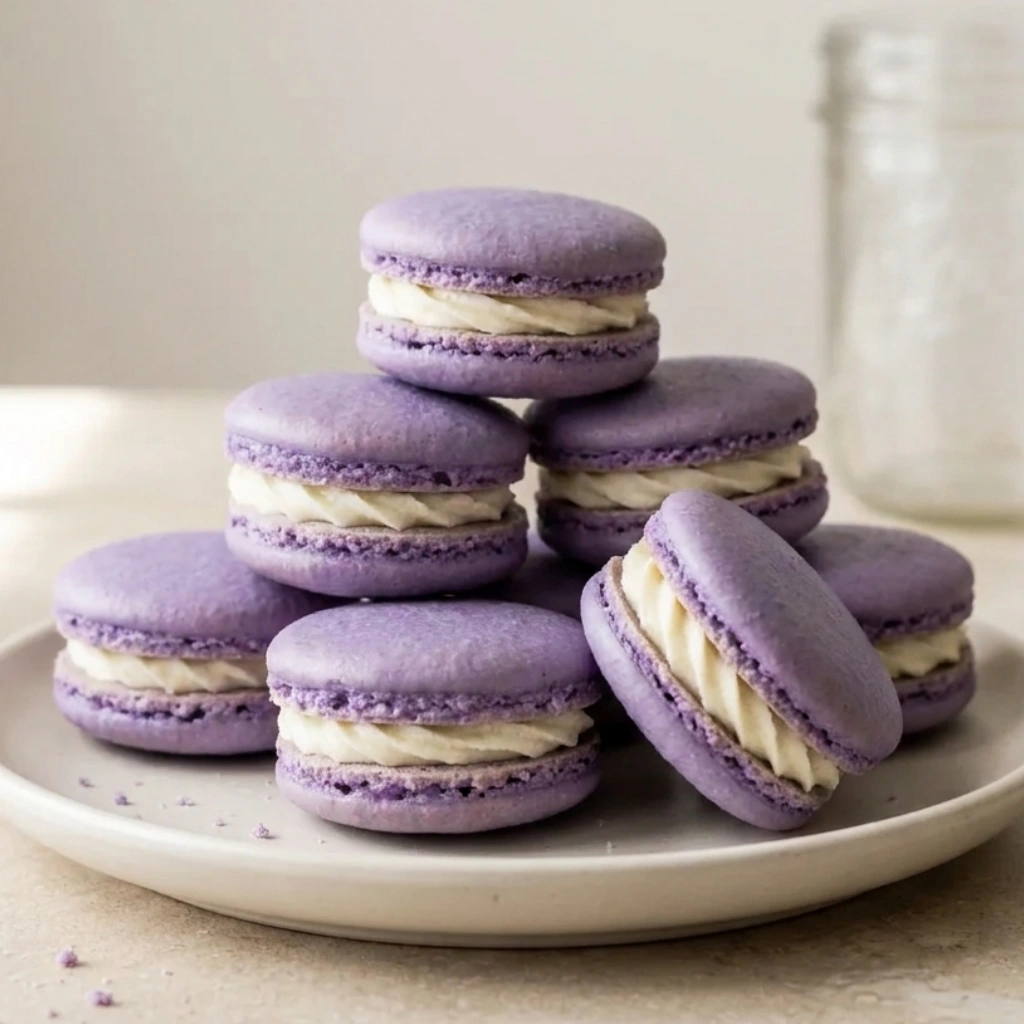
Homemade french macarons are more than just a delicate almond cookie; they are a labor of love that brings a sense of grace and accomplishment to any kitchen. There is a specific kind of magic that occurs when a few humble ingredients, egg whites, sugar, and almonds, transform into a sophisticated treat that looks like it belongs in a high-end boutique. While many bakers feel intimidated by the precision required, the process is actually a beautiful lesson in patience and presence.
Creating these dainty delights is perfect for those moments when life slows down, perhaps a rainy Sunday afternoon or a quiet morning before a big celebration. Whether preparing a batch for a baby shower, a heartfelt gift for a friend, or simply to elevate a weekend tea time, the effort put into every fold of the batter is felt in the final bite. The goal isn’t just to follow a recipe; it is to understand the rhythm of the meringue and the texture of the almond flour.
Before you start: Yeah, this recipe is a bit wordier than usual. There’s a reason for that, I’d rather teach you the “why” behind each step so you walk away feeling like a better baker, not just a hungry person with a plate. So grab a coffee, and let’s learn together.
Why You’re Gonna Love These Macarons
Emotional Satisfaction: Nothing beats the “oven-watch” thrill when those iconic ruffled feet begin to emerge.
Make-Ahead Magic: These actually taste better after a day in the fridge, making them the ultimate stress-free hosting dessert.
Gift-Worthy Elegance: A box of these hand-crafted beauties carries more sentiment than any store-bought luxury.
Texture Perfection: This specific ratio yields a shell that is thin and crisp on the outside with a soft, cloud-like interior.
Gentle Learning Curve: The instructions focus on visual cues, helping to build “baker’s intuition” rather than just memorizing steps.
Let’s Gather Everything First

100g “Aged” Egg Whites: Separate these 24 hours in advance and keep them in a covered bowl in the fridge. This breaks down the proteins (proteolysis), leading to a more elastic, stable meringue. Bring them to room temperature before starting.
90g Superfine Granulated Sugar: The fine grains dissolve seamlessly into the whites, preventing a grainy texture in the shells.
110g Extra-Fine Blanched Almond Flour: Ensure the flour is made from blanched almonds (no skins). Tip: If the flour feels oily or damp, toast it in a 200°F oven for 5 minutes and let it cool before sifting.
200g Confectioners’ Sugar: This provides the structure and the sweetness. Most brands include a touch of cornstarch, which is actually beneficial for stability.
2g Cream of Tartar: This acts as a stabilizer for the egg foam, ensuring the peaks don’t collapse during the macaronage.
1 Pinch of Fine Sea Salt: A tiny amount of salt balances the sweetness and highlights the nutty almond flavor.
Gel Food Coloring: Only use professional-grade gels. Liquid colors introduce moisture that can cause the shells to crack or fail to rise.
Let’s Make Them, One Step at a Time
1 The Fine-Tuning Sift
Begin by combining the almond flour and confectioners’ sugar. Place them in a food processor and pulse for 30 seconds to ensure they are perfectly integrated. Pass this mixture through a fine-mesh sieve into a large, dry bowl. Do not be tempted to skip this; any large bits of almond will result in a bumpy, “pebbled” surface on the shells rather than a mirror-smooth finish. If a tablespoon or two of almond bits won’t go through the sieve, replace them with a fresh tablespoon of flour to keep the ratios exact.
2 The Foundation of Foam
In a meticulously cleaned glass or metal bowl, begin whisking the room-temperature egg whites and cream of tartar on a low speed. Once the mixture resembles the foam on a latte, begin adding the granulated sugar one tablespoon at a time. This slow addition allows the sugar to dissolve properly, creating a strong protein network. Once all sugar is in, increase to medium-high speed.
3 Achieving the Stiff Peak
Continue whisking until the meringue is thick, glossy, and holds “stiff peaks.” When the whisk is lifted, the meringue should stand straight up like a bird’s beak without drooping over. This is the stage to add a small drop of gel coloring. Remember that the color will fade slightly during baking, so aim for a shade slightly deeper than the desired final result.
4 The Art of Macaronage
This is the soul of homemade french macarons. Fold the dry ingredients into the meringue in three stages. Use a silicone spatula to “cut” through the center and scrape around the sides. Once the flour is no longer visible, start the macaronage: press the batter against the sides of the bowl to knock out some air. Continue until the batter flows off the spatula in a slow, steady ribbon that looks like molten lava. A “test ribbon” should settle back into the rest of the batter and disappear within 10 to 15 seconds.

5 Piping with Purpose
Fit a piping bag with a medium-sized round tip. Place a template under the parchment paper if needed to ensure uniform sizes. Hold the bag perfectly vertical and squeeze from the top, stopping the pressure before pulling away with a quick “flick” of the wrist. This technique prevents the formation of “nipples” or peaks on the tops of the shells.

6 The Essential Release
Once a tray is filled, firming tap the baking sheet on the counter 4 to 5 times. This releases any tiny air bubbles trapped under the surface. If any bubbles remain visible, a toothpick can be used to gently pop them. This ensures the shells don’t crack from internal pressure while in the heat of the oven.
7 The Waiting Period
Let the piped shells sit at room temperature for 30 to 60 minutes. This is perhaps the most vital step; it allows a “skin” to form on the surface. When the shell can be touched lightly with a finger without sticking, they are ready. This skin forces the air to escape through the bottom, which is exactly how those beautiful “feet” are created.
8 The Gentle Bake
Preheat the oven to 300°F (150°C). Bake one tray at a time for 14 to 17 minutes. To test for doneness, gently touch the top of a shell and try to wiggle it. If it feels firm and doesn’t slide on its “feet,” it is ready. Let them cool completely on the tray before peeling them off the parchment.

Little Things That Make a Big Difference
The “Clean Bowl” Rule: Even a speck of fat or oil in the mixing bowl will prevent the egg whites from foaming. Wipe the bowl and whisk with a little lemon juice or white vinegar before starting to ensure a pristine environment.
Watch the Weather: High humidity is the enemy of the macaron. On very humid days, the “skin” may never form. If baking in a damp climate, run the air conditioning or a dehumidifier to help the shells dry.
Oven Hot Spots: Every oven has a personality. If the macarons are browning on one side, rotate the tray halfway through the baking time. Using a double-layered baking sheet can also prevent the bottoms from browning too quickly.
The Figure-8 Test: When folding the batter, try to draw a figure-8 with the stream falling from the spatula. If the 8 can be completed without the stream breaking, the consistency is perfect.

Nutrition (per macaron shell + filling)
Calories: 102 kcal
Carbs: 16g
Protein: 2.2g
Fat: 4.1g
Fiber: 0.8g
Sugar: 14g
Sodium: 18mg
Nutrition info is estimated and may vary based on specific brands and filling amounts.
Got Questions? I’ve Got You
Why did my macarons turn out hollow?
Hollow shells are usually caused by over-whisking the meringue or under-mixing the batter during the macaronage stage. If too much air is incorporated and not properly “knocked out” during the folding process, the shells will rise too quickly and then collapse internally, leaving a gap between the top and the crumb.
Can I use liquid food coloring?
It is highly recommended to avoid liquid coloring. The extra water content can thin out the meringue, leading to shells that are flat, cracked, or sticky. Gel or powder colors are concentrated and won’t disturb the delicate balance of the homemade french macarons batter.
How do I store these for a party?
Macarons are quite sturdy once matured. Store them in an airtight container in the refrigerator for up to 5 days. For longer storage, they freeze beautifully for up to 3 months. Just be sure to bring them to room temperature for at least 20 minutes before serving so the buttercream softens and the flavors bloom.
Go Enjoy Those Macarons
So, French macarons take a little practice, no sugarcoating it. But once you nail that first batch with the perfect little feet and smooth shells? Pure magic.
The best part is what comes next: filling them with something amazing. Velvety white chocolate ganache, fresh raspberry jam, or whatever you’re craving. Each bite says “I made these just for you,” and that feeling never gets old.
If this guide helped you, I’d love to hear about your macaron journey, drop a comment below. And hey, if you found it useful, save it to Pinterest or share it with a friend who loves to bake. Nothing makes my day like seeing your kitchen wins.
Happy baking!
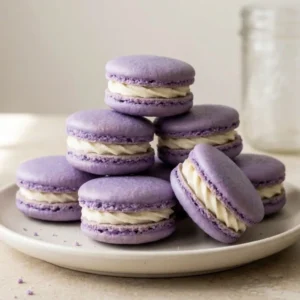
Dreamy Homemade French Macarons
Ingredients
- 100 g egg whites
- 90 g granulated sugar
- 110 g almond flour
- 200 g powdered sugar
- 2 g cream of tartar
- 115 g unsalted butter
- 240 g powdered sugar
- 15 ml heavy cream
- 5 ml vanilla paste
Instructions
- Sift almond flour and powdered sugar together twice. Discard any large almond fragments.
- Whisk egg whites, cream of tartar, and granulated sugar until the mixture forms stiff, glossy peaks.
- Fold the dry ingredients into the meringue. Continue folding until the batter flows off the spatula in a slow “lava” ribbon.
- Pipe 1.5-inch circles onto a lined tray. Tap the tray firmly to release air bubbles.
- Let the shells rest at room temperature for 45 minutes until a dry skin forms.
- Bake at 300°F for 15 minutes. Cool completely before filling with vanilla buttercream.