If you’ve seen hot chocolate bombs all over TikTok or Instagram and wondered if they’re worth the hype, the answer is yes — if you make them right. This hot chocolate bombs recipe is designed for real home kitchens, not just Pinterest-perfect photos. You’ll learn how to make them without fancy gear, using tips that actually help.
These are more than just trendy — they’re fun to make, incredibly giftable, and a clever way to level up a cup of cocoa. Whether you’re planning a cozy winter night, need a last-minute holiday gift, or just want to impress your kids, these chocolate bombs deliver.
No fluff. No melted messes. Just solid instructions, realistic tools, and tips from someone who’s made plenty of these.
*Before You Start: You’ll find more explanation here than a basic recipe. That’s intentional—the aim is to educate, not just instruct.
Why You’ll Love This Recipe
➲ Works with basic kitchen tools: No need for special molds or gadgets—just a pan, spatula, and a few simple tools.
➲ Easy to customize: Add mix-ins, flavors, or toppings to make it your own—nuts, extracts, or even a sprinkle of sea salt all work beautifully.
➲ Kid-friendly and fun to decorate: Perfect for little hands to help with rolling, drizzling, or sprinkling toppings.
➲ Great for gifting or batch-making: Make a big batch to share with friends, family, or coworkers—fudge always feels special.
➲ Stores well for weeks: Keep it in an airtight container, and it stays fresh and delicious for multiple weeks.
➲ Real tips that prevent common mistakes: From avoiding grainy texture to clean-cut squares, these tips help ensure success every time.
Ingredients
Here’s what you need to make six hot chocolate bombs:
• 200g semi-sweet chocolate or dark chocolate (chopped or chips)
Use real chocolate, not candy melts, for best taste. Couverture is ideal if you have it.
• 6 tbsp hot cocoa mix
Use any powdered cocoa mix — store-bought or homemade.
• Mini marshmallows (roughly 1/2 cup)
Dehydrated marshmallows are ideal for shelf-stable bombs, but mini fresh ones work too.
• Optional fillings:
• Crushed peppermint candy
• Caramel bits
• Instant coffee granules
• Cinnamon or chai spice mix
• Silicone half-sphere mold (2-inch or 5-inch preferred)
If you don’t have a mold, see the FAQ below for workarounds.
• Microwave-safe bowl or double boiler
Don’t overheat — slow and steady keeps the chocolate smooth.

Step-by-Step Instructions
➲ Melt the Chocolate
Chop your chocolate if using bars. Transfer to a microwave-safe bowl and heat in 20-30 second bursts, stirring after each interval. Remove while some pieces remain solid, then continue stirring until completely melted using the remaining heat.
Tip: Do not overheat — overheated chocolate gets thick and gritty.

➲ Coat the Mold
Using a spoon or a food-safe brush, coat each half-sphere mold with a thin, even layer of melted chocolate. Make sure to bring the chocolate up the sides so the shells are fully covered and sturdy. Once coated, place the molds in the fridge for about 10 minutes to allow the chocolate to set before adding any fillings.
Optional: Do a second coating for sturdier shells, especially around the rims.

➲ Unmold the Shells
Once the chocolate has fully set, carefully remove the halves from the mold by gently pressing the silicone from the bottom. Take your time to avoid cracking the shells. Place them open-side up on a clean plate or baking sheet, ready for filling or assembly.
➲ Fill the Bombs
In half of the chocolate shells, spoon in about 1 tablespoon of cocoa mix along with a small handful of mini marshmallows. This is also the time to add any extra fillings, like crushed candy canes, caramel bits, or sprinkles. Be careful not to overfill—the shells need enough space at the top to seal them neatly with the other halves.
➲ Seal the Bombs
Warm a plate in the microwave or over a pot of hot water. Gently press an empty shell rim-down on the warm plate for a few seconds to slightly melt the edge. Quickly place it on top of a filled shell and hold for 5–10 seconds to seal.
Tip: Don’t use water — chocolate seizes if it gets wet.
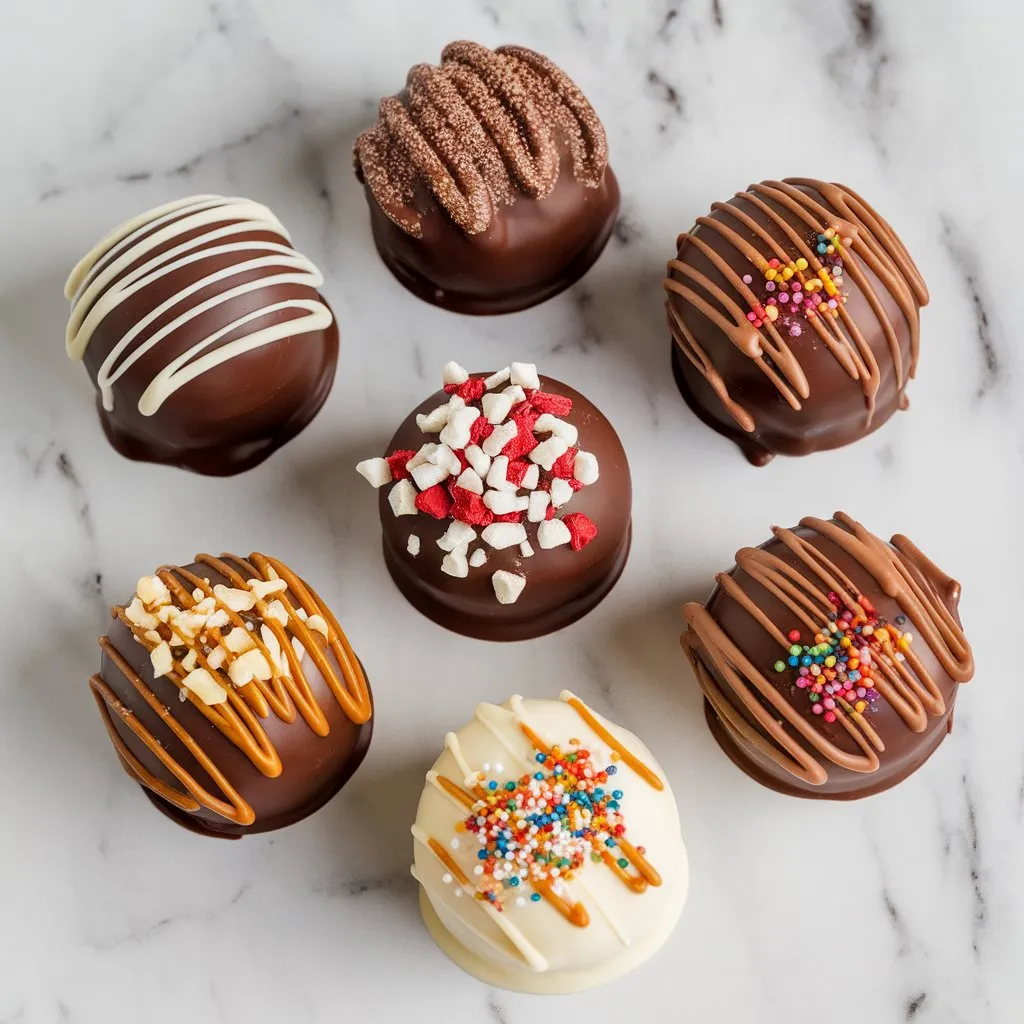
➲ Decorate (Optional)
Drizzle the finished chocolates with any leftover melted chocolate for a beautiful, glossy finish. While the chocolate is still soft, add toppings like sprinkles, edible glitter, crushed peppermint, or mini marshmallows. Place the chocolates back in the fridge for a short time to let the decorations set completely before serving or packaging.

➲ Store Properly
Store your hot chocolate bombs in an airtight container at room temperature for up to 2 weeks. If your kitchen tends to be warm, refrigeration is a good option. Make sure to keep them away from any moisture, as even a little humidity can cause the chocolate to bloom or the shells to lose their crisp texture.
➲ Serve
Place a hot chocolate bomb in your favorite mug, then pour 1 cup of steaming hot milk—avoid using water, as milk gives a richer, creamier texture—directly over the bomb. Watch as the chocolate melts and the marshmallows or cocoa mix spill out in a magical reveal. Stir well to combine all the melted chocolate and fillings before sipping.

Pro Tips for Perfect Hot Chocolate Bombs
• Tempering isn’t strictly required: You don’t have to temper the chocolate perfectly, but letting it cool slightly before pouring into molds helps it set with a smooth, glossy finish and prevents it from being too soft or sticky.
• Use gloves when handling the shells: Wearing gloves avoids fingerprints, smudges, and unwanted oils on the chocolate, keeping your shells looking clean and professional.
• Avoid humid environments: Moisture is the enemy of chocolate shells—it can cause them to bloom, stick, or soften. Work in a dry space for the best results.
• Level your mold: Always place your mold on a flat, stable tray. This ensures the chocolate sets evenly and your shells come out straight, not lopsided.
• Don’t overfill the center: While it’s tempting to pile in the goodies, leave enough room around the edges for a clean seal. Overfilling can make it difficult to close the bombs neatly.
Got a Question? Bet You’ll Find It Here
➲ Can I make hot chocolate bombs without a mold?
Yes! You can use cupcake liners to shape chocolate cups. Simply coat the inside of each liner with melted chocolate and let it set. Once firm, you can either seal the cup with a flat chocolate disc for a closed bomb or leave them open-top and fill them with marshmallows, cocoa mix, or other treats to serve as fun “hot cocoa cups.”
➲ What type of chocolate works best?
Use real chocolate bars or chips that contain cocoa butter rather than candy melts. Real chocolate melts smoothly, sets with a nice snap, and gives a rich, authentic flavor. You can choose dark, milk, or semi-sweet chocolate depending on your personal taste and how rich or sweet you want your hot chocolate bombs to be.
➲ Can I freeze them?
Technically, you can freeze hot chocolate bombs, but it’s not ideal. Freezing can cause condensation to form when you take them out, which may ruin the smooth chocolate shell or cause it to bloom. For best results, store your bombs in a cool, dry pantry or in the fridge, away from moisture and heat.
➲ How do I double the batch?
To make a larger batch, simply double all the ingredients. Ensure your molds can accommodate the extra volume, or work in batches to avoid overcrowding. Don’t worry if the chocolate stays melted for a while—a warm bowl keeps it pourable and easy to work with, so you can take your time filling the molds.
➲ Why did my shells crack or look dull?
Cracking in chocolate shells usually happens when the chocolate cools unevenly or the shells are too thin. A dull, matte finish often indicates the chocolate wasn’t tempered properly or was over-handled. To prevent these issues, use flexible silicone molds and handle the shells gently throughout the process. This helps ensure smooth, glossy, and intact chocolate shells every time.
Conclusion
Making hot chocolate bombs at home is easier than it looks — especially with the right guidance. This recipe gives you structure, flexibility, and real-deal results without the usual mess or mystery. Whether you’re gifting them, making a winter treat, or just doing a fun weekend project, this version is built for real kitchens.
If you liked this, you’ll probably enjoy these other cozy DIY treats:
• Strawberry Shortcake Ice Cream Bars
• Pumpkin Cheesecake Balls! The Perfect Fall Treat
If you try this recipe, leave a comment, rate it, or tag me with your creations—I’d love to see how yours turn out! And don’t forget to save it to Pinterest so you can easily find it anytime you want to make these delicious treats again.ot chocolate bombs #hot chocolate bombs recipe

Hot Chocolate Bombs Made Simple
Ingredients
- 12 oz semi-sweet chocolate chopped or chips
- 6 tbsp hot cocoa mix
- 1 cup mini marshmallows
- 1 tsp coconut oil optional, for smoother chocolate
- Sprinkles or crushed candy optional, for topping
Instructions
- Melt the chocolate in a microwave-safe bowl in 20-second intervals, stirring until smooth.
- Spoon 1 tablespoon of melted chocolate into each silicone mold cavity and coat evenly.
- Chill the molds for 5 minutes, then apply a second layer for thickness and refrigerate until set.
- Gently remove the chocolate shells from the mold.
- Fill half of the shells with cocoa mix and mini marshmallows.
- Warm the edges of the remaining shells on a hot plate and press them gently onto the filled halves to seal.
- Drizzle with extra chocolate and decorate as desired. Let set completely before serving or packaging.