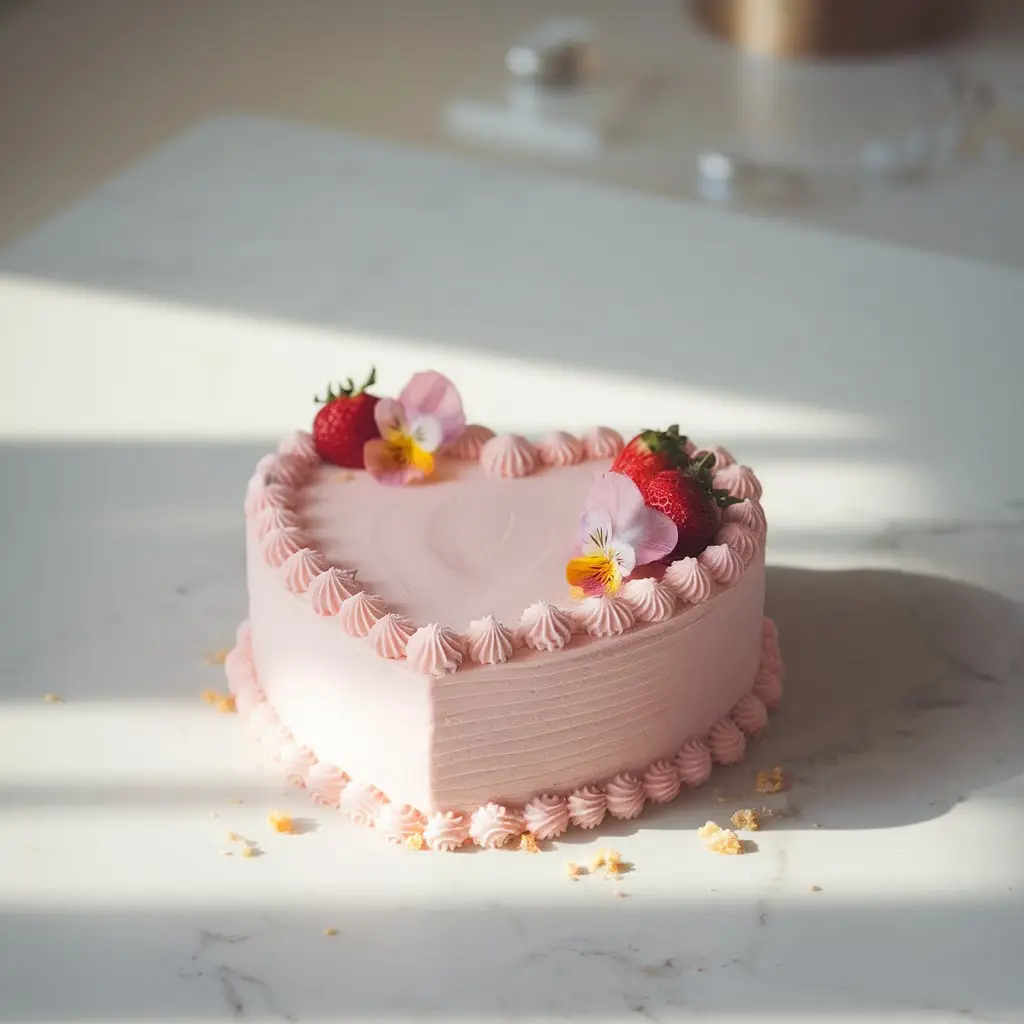
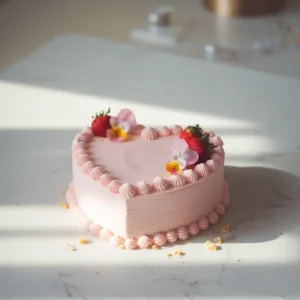
Looking to impress with a show stopping dessert that screams “I love you”? This heart cake recipe gives you the wow factor without complicated tools or fancy skills. You can create a stunning heart cake without any special equipment or advanced decorating skills. Using just a square pan and a round pan along with some clever techniques, you’ll achieve a professional-looking heart-shaped cake that rivals any bakery creation.
It’s ideal for Valentine’s Day, anniversaries, bridal showers, or any time you want to bake with love (and get serious compliments). Bonus: it works with nearly any cake flavor, from classic vanilla to red velvet or chocolate.
What Makes It So Good
❃ No Special Tools: You don’t need fancy equipment; a simple round and square cake pan are all it takes to create a beautiful, layered treat.
❃ Beginner-Friendly: Even if it’s your first time baking, this recipe is forgiving and straightforward. Follow the steps, and you’ll have a stunning result without stress.
❃ Custom Flavors: Make it your own! Swap in your favorite batter—vanilla, chocolate, red velvet, or whatever makes your taste buds happy. The method works with almost any base.
❃ Decorating is Optional: Don’t stress about perfection. A basic frosting job is enough to make it look polished and irresistible, leaving room for fun if you want to get creative.
❃ Memorable & Giftable: This treat isn’t just about taste—it’s about sharing joy. Perfect for birthdays, holidays, or just making someone feel extra special.
What Goes In

For the Cake:
• 2½ cups (310g) all-purpose flour
• 1½ cups (300g) granulated sugar
• 2 tsp baking powder
• ½ tsp baking soda
• ½ tsp salt
• 1 cup (240ml) buttermilk (or milk + 1 tbsp vinegar)
• ½ cup (120ml) vegetable oil
• 2 large eggs, room temperature
• 2 tsp vanilla extract
• Red or pink gel food coloring (optional)
For the Frosting:
• 1 cup (230g) unsalted butter, softened
• 4 cups (480g) powdered sugar
• 2–4 tbsp milk or cream
• 1 tsp vanilla extract
• Pinch of salt
Optional: food coloring, sprinkles, berries
Step-by-Step Heart Cake Instructions
➲ Preheat and Prepare the Pans
Start by preheating your oven to 350°F (175°C). Prepare both an 8-inch square pan and an 8-inch round pan by greasing them well with butter or non-stick spray, then lining the bottoms with parchment paper. This helps ensure your cakes release cleanly without sticking or tearing.
➲ Mix the Dry Ingredients
In a medium bowl, whisk together the flour, baking powder, baking soda, and salt. Set this aside. Mixing the dry ingredients separately helps distribute the leavening evenly so the cake rises uniformly.
➲ Combine the Wet Ingredients
In a large mixing bowl, combine the buttermilk, vegetable oil, sugar, eggs, and vanilla extract. Whisk until the mixture is smooth and cohesive. If you’re using food coloring for a red or pink heart cake, now is the time to add it. Use gel food coloring for better color and to avoid thinning the batter.
➲ Combine the Wet and Dry Mixtures
Gradually stir the dry ingredients into the wet mixture in two or three batches, mixing gently until just combined. Be careful not to overmix at this stage—stop as soon as there are no visible streaks of flour. The batter should be thick but pourable.
➲ Divide and Bake
Evenly divide the batter between the prepared square and round pans. Smooth the tops and gently tap each pan on the counter to remove any air bubbles. Place both pans on the middle rack of your preheated oven and bake for 30 to 35 minutes, or until a toothpick inserted into the center of each cake comes out clean. Once baked, let the cakes cool in their pans for 10 minutes before carefully turning them out onto wire racks to cool completely.
➲ Shape the Heart
Once both cakes are fully cooled, you can shape your heart. Position the square cake so that it sits like a diamond, with one point facing down. Slice the round cake directly in half to create two equal semi-circles. Position these two halves along the top edges of the diamond to create the curved upper portions of the heart. Adjust their placement as needed until the overall shape appears balanced and natural. If needed, trim the inner edges for a tighter fit.

➲ Make the Buttercream
To prepare the frosting, beat softened butter until creamy and pale—about 3 to 5 minutes. Slowly add powdered sugar, one cup at a time, and continue mixing. Add vanilla extract, a pinch of salt, and a few tablespoons of milk or cream until you reach a spreadable consistency. If you’d like to tint the frosting, mix in a bit of gel food coloring at this stage.
➲ Crumb Coat and Chill
Place your assembled heart-shaped cake on a board or stand. 10.Apply a thin layer of frosting over the entire cake to trap any crumbs—this is called a crumb coat. Don’t worry about making it look perfect. Chill the cake in the fridge for about 15 to 20 minutes to let the frosting set and firm up before the final layer.
➲ Frost and Decorate
Once chilled, cover the cake with a smooth final layer of buttercream. Use an offset spatula to work carefully around the curved tops and pointed edges. 4.Keep your strokes even and smooth, adding more frosting as needed. You can keep the look simple, or decorate with piped borders, sprinkles, fruit, or even a short message across the top.

➲ Serve or Store
Once finished, you can serve the cake immediately or refrigerate it until needed. If chilled, let it sit at room temperature for 30 to 45 minutes before slicing so the texture softens slightly. The cake keeps well for up to three days in the fridge when stored in an airtight container or wrapped properly.
Decorating Ideas
Keep it simple, or go all out:
• Top with fresh raspberries or sliced strawberries
• Use a star tip to pipe rosettes or borders
• Add edible glitter, gold leaf, or themed sprinkles
• Write a short message with melted chocolate or gel icing
• For a rustic look, finish with a naked-style frosting
Tiny Details That Make a Big Difference
❃ Don’t Skip the Chill: After applying the crumb coat, let the cake chill in the fridge. This step firms up the layers, ensuring the final frosting goes on smooth and flawless without crumbs sneaking into the top layer.
❃ Level the Layers: Use a serrated knife to trim any domed tops so each layer sits flat. Flat layers mean a cleaner, more polished cake and prevent leaning or sliding.
❃ Use Offset Spatulas: These are your best friends for frosting. They make it easy to spread evenly, smooth edges, and achieve that bakery-quality finish, especially around rounded corners.
❃ Avoid Liquid Food Coloring: Liquid dyes can thin your batter or frosting, altering texture and stability. Stick to gel or paste colors for vibrant results without compromise.
❃ Make It Your Own: Don’t be afraid to personalize! Swap vanilla extract for almond, orange, or even rose to create a subtle but memorable twist.
Everything You’re Probably Wondering Right Now
• Can I make this heart cake ahead of time?
Absolutely! You can bake the layers 1–2 days in advance. Just wrap them tightly and store at room temperature. Frost the cake on the day you plan to serve for the freshest, most impressive presentation.
• Can I freeze the cake?
Yes! Both unfrosted layers and fully decorated cakes freeze beautifully. Wrap tightly to protect from freezer burn, then thaw overnight in the fridge before serving. It’s a great option for prepping ahead of a special occasion.
• What if I only have one pan?
No worries. Bake one layer at a time, cleaning the pan in between. It takes a bit longer, but you’ll still get perfect layers ready for stacking and decorating.
• Can I use a box mix?
Yes, a standard box mix works perfectly for two 8-inch pans. For best results, pair it with homemade frosting—it really elevates the flavor and gives that bakery-quality finish.
A Sweet Ending — Literally and Figuratively
This heart cake is more than just dessert—it’s a sweet way to show love, whether you’re baking for Valentine’s Day, an anniversary, or a cozy weekend treat. With its soft texture, buttery frosting, and simple design, it’s proof that beautiful cakes don’t have to be complicated.
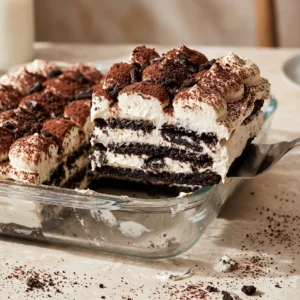
You may also like my:
❃ Easy Chocolate Ganache Cake That Wows Every Time (20 Min Prep!)
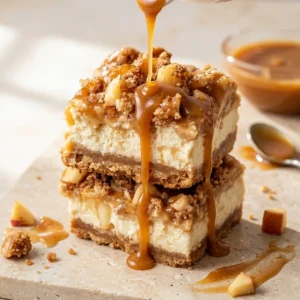
❃ Best Sopapilla Cheesecake Bars: 5-Ingredient Mexican Dessert
❃ Easy High Protein Carrot Cake Cheesecake Bars (30g Protein!)
❃ Easy 3 Ingredient Cake Mix Cookies (Ready in 15 Minutes!)
Save this Heart Cake recipe to Pinterest so you can bake it anytime love (or a sweet craving) strikes!
Heart Cake
Ingredients
- 2½ cups all-purpose flour
- 1½ cups granulated sugar
- 2 tsp baking powder
- ½ tsp baking soda
- ½ tsp salt
- 1 cup buttermilk or milk + 1 tbsp vinegar
- ½ cup vegetable oil
- 2 large eggs
- 2 tsp vanilla extract
- Pink or red gel food coloring optional
- 1 cup unsalted butter softened
- 4 cups powdered sugar
- 2 –4 tbsp milk or cream
- 1 tsp vanilla extract for frosting
- Pinch of salt
Instructions
- Preheat oven to 350°F (175°C). Grease and line one 8-inch round and one 8-inch square pan.
- In a bowl, whisk dry ingredients.
- In another bowl, mix wet ingredients until smooth.
- Combine and stir gently until blended.
- Divide batter evenly and bake 30–35 minutes, until a toothpick comes out clean.
- Cool completely. Cut the round cake in half and place halves on the top sides of the square cake to form a heart.
- Beat butter, sugar, vanilla, and milk to make frosting.
- Spread frosting evenly and decorate as desired.