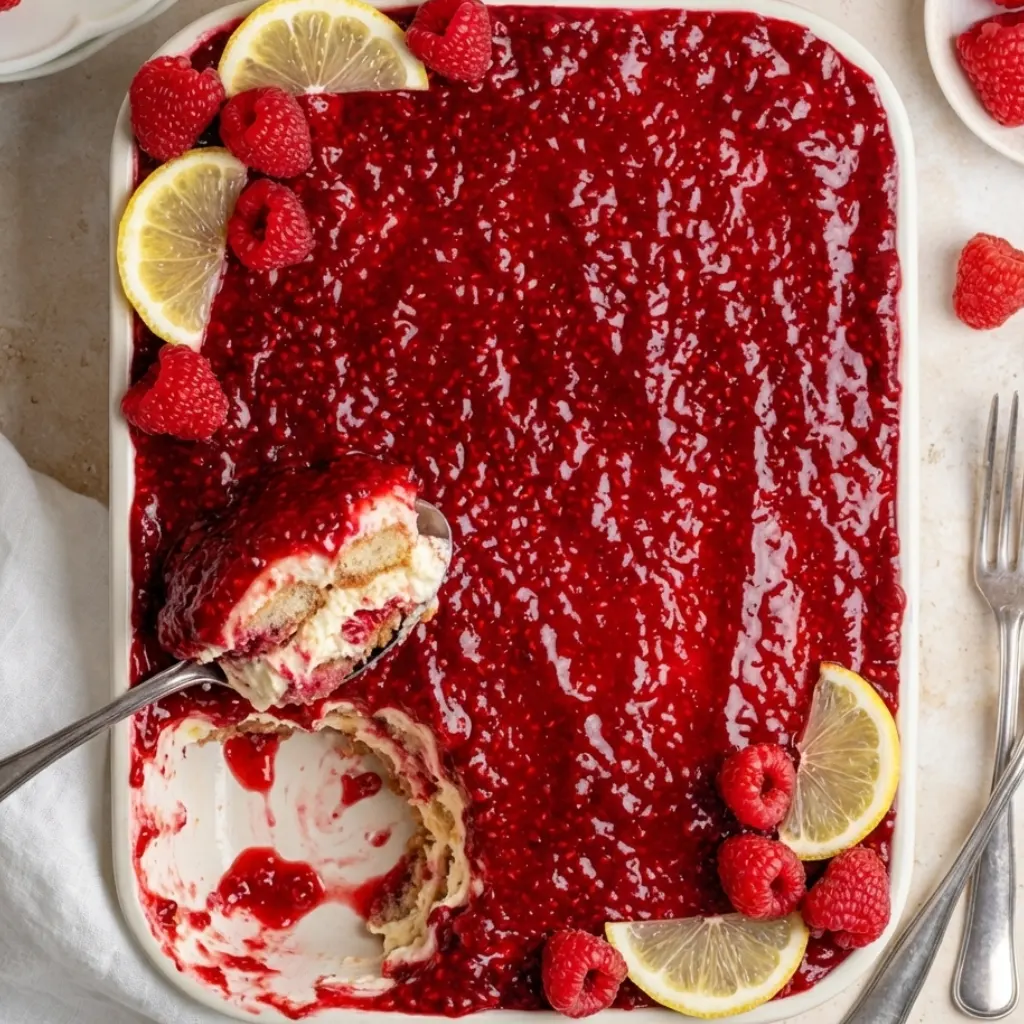
There’s something about a Fresh raspberry tiramisu that just feels special. The vibrant layers of raspberry sauce, soft ladyfingers, and fluffy lemon mascarpone cream create a dessert that’s as pretty as it is delicious. It’s the kind of treat people notice right away, and yes, they’ll probably take a photo before the first bite.
The best part? This is a no-bake tiramisu, so it’s incredibly easy to make. No oven, no complicated steps, just about 30 minutes of prep and a little chill time in the fridge. When you bring it out, it looks like something from a bakery, but you made it right in your own kitchen.
Instead of the classic coffee flavor, this version uses a bright, homemade raspberry sauce that makes the dessert taste fresh, light, and perfect for warmer days. It’s wonderful for summer gatherings, birthdays, or simply when you’re craving a beautiful dessert. And since you can use fresh or frozen raspberries, you can enjoy it any time of the year.
*Before You Start: You’ll find more explanation here than a basic recipe. That’s intentional, the aim is to educate, not just instruct.
Why This Fresh Raspberry Tiramisu Is the Dessert Everyone Asks For
Zero baking: No oven, no stress, no sweat this comes together entirely in the fridge.
It tastes even better the next day: Those layers need time to meld, and overnight chilling gives you a dessert that’s deeply flavored and perfectly sliceable.
Egg-free mascarpone cream: No raw yolks here, which means it’s safe for kids, guests who are pregnant, and anyone who’d rather not think about it.
Fresh or frozen raspberries work: Peak summer freshness is gorgeous, but a bag of frozen raspberries from the back of the freezer makes an equally delicious sauce.
The most stunning thing on any table: That glossy red top layer over white cream is genuinely dramatic. It will be the first thing people reach for.
Scales effortlessly: Feeding 6 or 20? The layers stack the same way just use a bigger dish.
The Simple Ingredients Behind This Raspberry Tiramisu
Serves 10–12 | Prep: 30 min | Chill: 4–8 hours (overnight preferred)
For the Raspberry Sauce
500g (about 4 cups) fresh or frozen raspberries: Frozen is completely fine here. Just thaw them fully and drain off any excess liquid before cooking or the sauce will be watery.
80g (⅓ cup) granulated sugar: Taste your raspberries first. If they’re particularly tart, add an extra half tablespoon.
2 tbsp fresh lemon juice: Please don’t skip this. It’s what keeps the sauce from tasting one-dimensional and brings that gorgeous bright edge.
1 tbsp cornstarch: This is what gives the sauce its glossy, spoonable consistency rather than a thin runny syrup.
2 tbsp cold water: For dissolving the cornstarch before it goes into the pan.

For the Lemon Mascarpone Cream
500g (2¼ cups) full-fat mascarpone: Pull this out of the fridge 30 minutes before you start. Room-temperature mascarpone blends smoothly; cold mascarpone goes lumpy and doesn’t play well with whipped cream.
300ml (1¼ cups) heavy whipping cream: This one stays cold until the last second. Cold cream whips up faster and holds its shape far better.
80g (⅔ cup) powdered sugar, sifted: Sifting takes 20 seconds and prevents any strange lumps in your cream.
1 tsp pure vanilla extract
Zest of 1 lemon: Technically optional, genuinely essential. It ties the cream to the raspberry layer in a way that feels intentional rather than just assembled.
For Assembly
24–28 Savoiardi ladyfinger biscuits: Find these in the Italian foods section or baking aisle. Slightly stale or day-old ladyfingers are actually ideal they’re drier and absorb liquid without dissolving into mush.
120ml (½ cup) raspberry juice or diluted cordial: For dipping. In a pinch, thin some of the cooled raspberry sauce with a splash of cold water.
Fresh raspberries and lemon slices to garnish
Let’s Build This Raspberry Tiramisu Layer by Layer
1 Make the Raspberry Sauce First
Start with the sauce so it has time to cool while you do everything else. Add the raspberries, sugar, and lemon juice to a medium saucepan over medium heat. As they warm up, the berries will soften and collapse, give everything a gentle stir every minute or so. After about 5–7 minutes, the mixture will look deeply colored and jammy.
Whisk the cornstarch and cold water together in a small bowl until completely smooth (no dry lumps hiding at the bottom), then pour it into the raspberry pan. Stir continuously for 1–2 minutes until the sauce thickens and turns glossy. Take it off the heat and let it cool completely before you use it. It will look thinner than expected straight from the pan, that’s fine, it sets more as it cools.

2 Strain for a Silky Finish (Highly Recommended)
Once the sauce has cooled, pass it through a fine-mesh sieve, pressing firmly with the back of a spoon to push through as much of that gorgeous deep-red pulp as possible. You’re leaving the seeds behind, which gives the final dessert a much more elegant texture. Set aside roughly one-third of the strained sauce in a separate bowl, this is your showstopper top layer.
3 Make the Mascarpone Cream
In a large bowl, beat the room-temperature mascarpone on medium speed for about a minute, just until it loosens and looks smooth. Add the sifted powdered sugar, vanilla, and lemon zest and mix again briefly. In a separate bowl (ideally one that’s been chilled in the freezer for 10 minutes), whip the cold heavy cream to stiff peaks. Now fold the whipped cream into the mascarpone in two additions, slow, gentle folds with a rubber spatula. The goal is a cream that’s light, cloud-like, and billowy. Take your time here. Overmixing deflates everything you just built.

4 Set Up Your Dipping Station
Pour the raspberry dipping liquid into a shallow, wide bowl, wide enough to lay a ladyfinger flat without having to snap it. Make sure it’s fully at room temperature or cooler. Hot liquid turns ladyfingers to mush in a heartbeat.
5 Layer the Base
Dip each ladyfinger into the raspberry liquid for just 1–2 seconds per side. You want it moist but still holding its shape, not waterlogged. Lay them snugly in a single layer across the bottom of a 9×13 inch (23×33 cm) dish. Snap a few to fill any awkward gaps if needed. Nobody’s judging the bottom layer.
6 Build the First Cream and Raspberry Layer
Spoon half the mascarpone cream over the ladyfingers and spread it into a smooth, even layer with an offset spatula or the back of a large spoon. Then gently spoon half the raspberry sauce over the cream, spreading it slowly so the two layers stay defined. A little swirl at the edges? Completely fine, it looks beautiful, actually.
7 Repeat and Finish the Top
Add another layer of dipped ladyfingers, then the remaining mascarpone cream. Finally, pour the reserved one-third of raspberry sauce over the top and spread it all the way to the edges, covering the cream completely. This is the moment the whole thing comes together, that glossy, jewel-toned top layer that looks almost too good to cut into.
8 Chill, Then Serve
Cover the dish with plastic wrap and refrigerate for at least 4 hours, though overnight is genuinely better. Chilling lets the ladyfingers absorb moisture and soften into the cream, and gives every layer time to settle and firm into something sliceable and clean. When ready to serve, top with fresh raspberries and thin lemon slices. Use a sharp knife dipped in hot water (wiped dry between cuts) for the neatest slices.
5 Smart Tricks for the Best Raspberry Tiramisu
Let the lemon do its job: The lemon zest in the cream and the lemon juice in the sauce aren’t just decoration, they balance the richness of the mascarpone and keep the whole dessert tasting fresh instead of heavy. Don’t reduce either.
Cold bowl = better whipped cream: Ten minutes in the freezer before whipping makes a real difference. Cream whips faster, peaks are more stable, and the whole process is just easier.
Make the sauce up to 3 days ahead: It keeps beautifully in a sealed jar in the fridge, which means the day-of assembly genuinely takes under 30 minutes. This is the tip that makes this fresh raspberry tiramisu actually doable on a weeknight.
Hot knife for clean slices: Run your knife under hot water, dry it with a clean towel, slice, repeat. Takes an extra 30 seconds and makes every serving look like something from a food magazine.
Save some sauce for the plate: A small spoonful of extra raspberry sauce drizzled around each portion right before serving looks elegant and adds a lovely extra burst of fresh berry flavor.

Nutrition (Per Serving, Based on 12 Servings)
Calories: ~385 kcal
Carbohydrates: 38g
Protein: 6g
Fat: 23g
Fiber: 2g
Sugar: 22g
Sodium: 95mg
Nutrition info is estimated and may vary depending on specific brands and exact quantities used.
Everything People Ask About Raspberry Tiramisu
Can I use strawberries or mixed berries instead of raspberries?
Yes, and it works beautifully. Strawberries, blackberries, or a mixed berry blend all make a gorgeous sauce using the exact same method. Strawberries just need an extra minute on the heat to fully break down. The flavor changes, but the technique is identical, so once you’ve made this once, you have a no-bake layered dessert base that works with practically any soft fruit you love.
How far ahead can fresh raspberry tiramisu be made?
Up to 24 hours assembled in the dish is the sweet spot. After that, the ladyfingers continue to soften and the layers can lose their structure. If planning further ahead, make all the components separately (sauce keeps 3 days, cream assembles in 10 minutes) and put it together the morning of. That way everything is fresh and the layers stay distinct.
Can it be frozen?
It can, but it’s not the best experience. Mascarpone cream can turn slightly grainy after freezing and thawing, and the raspberry sauce can separate. If freezing is truly necessary, do it in individual portions, wrapped tightly in cling film. Thaw overnight in the fridge. It’ll still taste lovely, just not quite as silky or picture-perfect.
My cream turned out runny, what happened?
Two likely culprits: the mascarpone was too cold when you started (it doesn’t blend smoothly with whipped cream when chilled), or the cream was folded in too vigorously and deflated. To fix it, pop the cream mixture into the fridge for 20–30 minutes, it often firms right back up. If it’s still too loose, fold in 2–3 extra tablespoons of sifted powdered sugar before spreading.
Once You Make This Raspberry Tiramisu, It Becomes a Tradition
Once this fresh raspberry tiramisu has its debut at your table, it has a habit of becoming the dessert people request by name at every gathering after that. It’s the kind of recipe that earns a permanent spot in your rotation, not because it’s trendy, but because it genuinely delivers: stunning to look at, light enough to actually finish a second slice, and forgiving enough that even a first-time attempt comes out beautifully.
If this kind of make-ahead magic is your thing, you’ll love these too:
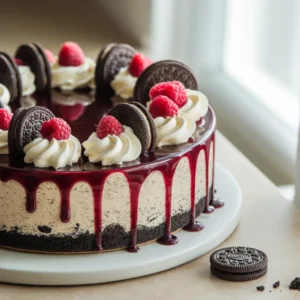
❃ Red Velvet Oreo Cheesecake Recipe
❃ Fudgy Red Velvet Brownies (So Easy, You’ll Make Them Weekly!)
❃ Frosted Coffee Brownies (The Best Fudgy Recipe You’ll Make!)
Did you make this recipe? I’d love to hear how it turned out! Leaving a star rating and a quick comment truly means a lot and helps other home bakers discover their next favorite dessert.
And if you’d like to keep this recipe handy, don’t forget to save it to your Pinterest dessert board so it’s ready the next time you need something sweet and impressive to bring to the table. Happy baking!

Fresh Raspberry Tiramisu That’s Almost Too Pretty to Eat (No-Bake!)
Ingredients
Raspberry Sauce
- 500 g 4 cups fresh or frozen raspberries
- 80 g ⅓ cup granulated sugar
- 2 tbsp fresh lemon juice
- 1 tbsp cornstarch
- 2 tbsp cold water
Lemon Mascarpone Cream
- 500 g 2¼ cups full-fat mascarpone, room temperature
- 300 ml 1¼ cups heavy whipping cream, cold
- 80 g ⅔ cup powdered sugar, sifted
- 1 tsp pure vanilla extract
- Zest of 1 lemon
Assembly
- 24 –28 Savoiardi ladyfinger biscuits
- 120 ml ½ cup raspberry juice or diluted raspberry cordial
- Fresh raspberries and lemon slices for garnish
Instructions
- Make the sauce. Cook raspberries, sugar, and lemon juice in a saucepan over medium heat for 5–7 minutes. Stir cornstarch and cold water together, then add to the pan. Stir 1–2 minutes until glossy and thickened. Cool completely.
- Strain. Press sauce through a fine-mesh sieve to remove seeds. Reserve ⅓ of the strained sauce separately for the top layer.
- Make the cream. Beat mascarpone until smooth. Add powdered sugar, vanilla, and lemon zest. In a separate cold bowl, whip cream to stiff peaks. Fold whipped cream gently into mascarpone in two additions.
- Dip the ladyfingers. Pour dipping liquid into a shallow bowl. Dip each ladyfinger 1–2 seconds per side, moist, not soggy.
- Build the layers. Arrange dipped ladyfingers in a 9×13 inch dish. Spread half the cream, then half the sauce. Repeat with remaining ladyfingers, cream, and finish with the reserved sauce on top.
- Chill. Cover and refrigerate at least 4 hours, overnight preferred. Garnish with fresh raspberries and lemon slices before serving.
Notes
- Room-temperature mascarpone blends smoothly, take it out 30 minutes before you start.
- The sauce can be made up to 3 days ahead and stored in a sealed jar in the fridge.
- Overnight chilling gives the cleanest, most flavorful result.
- For neat slices, dip your knife in hot water and wipe dry between each cut.
- Frozen raspberries work just as well as fresh, thaw and drain fully before cooking.