If you’ve ever wanted to make chocolate fudge but felt intimidated by candy thermometers or precise sugar stages, this chocolate fudge recipe is for you. It’s fast, foolproof, and made with ingredients you probably already have in your kitchen. You won’t need a thermometer, you won’t need a candy-making degree, and you definitely won’t need a ton of time. Just 15 minutes, a saucepan, and some pantry basics — that’s it.
This is the kind of chocolate fudge you can whip up for last-minute holiday gifts, quick potluck treats, or late-night cravings. It’s rich and creamy, with just the right balance of sweetness and chocolate depth. Whether you’re a beginner or a seasoned cook, this recipe delivers consistent, delicious results without the usual fuss. No flaky steps, no “hope this sets” moments — just real-deal chocolate fudge that works.
Why You’ll Love This Chocolate fudge
➲ Ready in 15 minutes: This recipe comes together incredibly fast, with no long waiting or complicated steps—perfect for a quick snack, last-minute dessert, or spontaneous treat.
➲ No thermometer needed: You don’t need any fancy equipment—just stir, melt, and pour. It’s simple enough for beginners but still delivers professional results.
➲ Beginner-friendly: With clear, step-by-step instructions and common ingredients you likely already have, even first-time bakers can succeed without stress.
➲ Perfect texture: The finished result is creamy, smooth, and sliceable—not too runny, not too stiff—so every bite feels indulgent and satisfying.
➲ Customizable: Make it your own by adding mix-ins like nuts, a sprinkle of sea salt, a pinch of espresso powder, or flavor extracts. It’s easy to tweak for your taste.
➲ Stores and freezes well: Make it ahead or save leftovers for later. It keeps its flavor and texture in the fridge for several days and freezes beautifully for up to a couple of months.
Ingredients
Here’s everything you need to make classic chocolate fudge, plus some options if you want to customize it:
• 2 cups (340g) semisweet chocolate chips
You can use dark or bittersweet chips for a less sweet fudge
• 1 (14-ounce) can sweetened condensed milk
Don’t use evaporated milk — it won’t set
• 2 tablespoons (28g) unsalted butter
Adds richness and smooth texture
• 1 teaspoon vanilla extract
Optional but recommended for flavor
1/4 teaspoon salt
Balances the sweetness
• Optional Add-ins:
• 1/2 cup chopped walnuts or pecans
• 1/2 teaspoon espresso powder (for deeper chocolate flavor)
• Flaky sea salt for topping
Pan Size: Use an 8×8-inch square pan for thicker fudge or a 9×9 for thinner squares. Line it with parchment paper for easy removal.
Storage Notes: Store in an airtight container at room temperature for up to 5 days, or in the fridge for up to 2 weeks. Store in a freezer-safe container for up to 3 months.
Let’s Make It Together — Step by Step
➲ Prepare your pan
Line an 8×8-inch baking pan with parchment paper, leaving a few inches of overhang on two sides so you can easily lift the fudge out once it’s set. For an extra-smooth release, lightly grease the parchment with a bit of butter or nonstick spray—this ensures the fudge comes out cleanly without sticking to the paper.
➲ Melt the chocolate and condensed milk
In a medium saucepan over low heat, combine the chocolate chips, sweetened condensed milk, and butter. Using a silicone spatula or wooden spoon, stir constantly until fully melted and smooth. This takes about 5 minutes. Don’t walk away — chocolate can scorch quickly.

➲ Add salt and vanilla
Once the mixture is fully melted, remove the pan from heat. Stir in the salt and vanilla extract until everything is completely incorporated. If you’re adding espresso powder, extracts, or any other flavorings, fold them in at this stage so the flavors blend evenly throughout the fudge.
➲ Fold in add-ins (optional)
If you’re adding chopped nuts, chocolate chips, or other mix-ins, fold them in now while the fudge is still warm and pourable. Be gentle—stir just enough to distribute them evenly throughout the mixture without overworking it, so every bite has a perfect balance of flavor and texture.
➲ Pour into pan
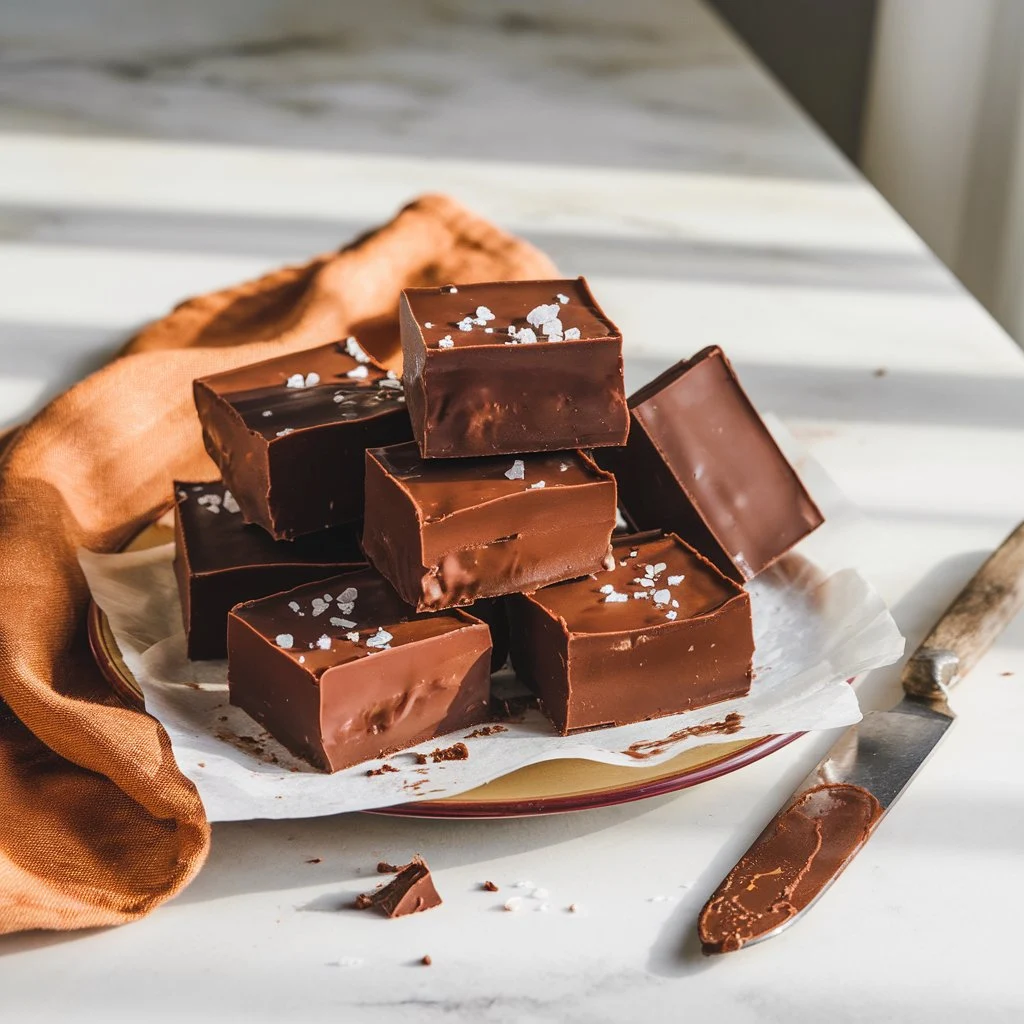
Quickly transfer the warm fudge mixture into your prepared pan, spreading it evenly with a spatula. Smooth the top so it’s level, then, if you’re using flaky salt, chocolate shavings, or other decorative toppings, sprinkle them on now while the surface is still soft—this ensures they stick as the fudge sets.

➲ Let it set
Let the fudge sit at room temperature for about 2 hours to set, or refrigerate for around 1 hour if you’re short on time. The goal is a firm but tender texture—soft enough to cut easily into clean slices, yet solid enough to hold its shape. Avoid chilling too long, or it may become overly hard.
➲ Slice and serve
Carefully lift the set fudge out of the pan using the parchment paper overhang. Place it on a cutting board and use a sharp knife to slice it into small squares—since this fudge is rich, smaller pieces are ideal for enjoying without feeling overwhelmed. For the cleanest edges, wipe the knife with a warm, damp cloth between cuts.

Tiny Details That Make a Big Difference
• Always use low heat when melting the chocolate. Trying to rush the process with high heat can easily scorch the chocolate, causing it to seize or develop a gritty, grainy texture. Patience here ensures a smooth, creamy fudge every time.
• Avoid over-stirring the chocolate once it’s melted and smooth. Remove it from the heat promptly, and fold gently as needed. Overmixing can cause the chocolate to seize or separate, resulting in an oily or grainy texture instead of silky, creamy fudge.
• Line your pan with parchment paper and leave an overhang on two sides. This simple step makes lifting the set fudge clean and effortless—no scraping or prying required—and helps keep the edges neat when you cut it into squares.
• Clean cuts make a big difference in presentation. Before slicing, dip your knife in warm water and wipe it dry between each cut. This keeps the edges smooth and neat, giving you professional-looking fudge squares that are as pretty as they are delicious.
• Flavor smartly: A small pinch of cinnamon, cayenne, or other spices can take your fudge from good to unforgettable. Add them gradually and taste as you go, so the subtle warmth or spice enhances the chocolate without overpowering it. A little goes a long way!
Got Questions? I’ve Got You Covered
➲ Can I freeze chocolate fudge?
For longer storage, wrap the fudge tightly in plastic wrap and place it in an airtight container. It freezes beautifully for up to 3 months. When you’re ready to enjoy it, thaw the fudge in the fridge overnight to preserve its creamy texture and rich flavor.
➲ Can I use milk chocolate instead?
You can use milk chocolate chips if you like, but keep in mind that the fudge will turn out sweeter and a bit softer. For the best balance of flavor and a firmer, more sliceable texture, dark or semisweet chocolate chips are recommended. They give the fudge that rich, chocolatey depth without being overly sugary.
➲ What if I don’t have sweetened condensed milk?
Unfortunately, this recipe relies on sweetened condensed milk for both structure and sweetness. If you try to substitute it with another ingredient, the texture and consistency of the fudge will be affected, and you’d need to follow a completely different method to achieve the same results.
➲ How do I double the recipe?
To make a larger batch, simply double all the ingredients and use a 9×13-inch baking pan. The fudge may take a little longer to set because of the increased volume, but the steps and technique remain exactly the same. You’ll end up with more delicious squares to share—or keep all to yourself!
➲ My fudge turned oily or grainy. What went wrong?
This usually means the heat was too high or it was overmixed. Use low heat and stir just until melted. Don’t keep it on the burner too long.
End of the Recipe, Start of a New Obsession
This chocolate fudge recipe is the kind of thing every home cook should have in their back pocket — fast, reliable, and endlessly flexible. It’s rich, satisfying, and ridiculously easy to pull off. Whether you’re making a holiday gift box, prepping for a bake sale, or just craving something sweet without the hassle, this fudge gets it done.
If you liked this recipe, you might also want to try:
• Marry Me Chicken Pasta: 30-Min Prep, Insanely Creamy & Easy
• Hot Chocolate Bombs Made Simple: 5 Ways to Nail It
• Chocolate Covered Pretzels: Easy No-Bake Treat in 15 Minutes
• Supreme Pizza Recipe: 5 Toppings You Should Never Skip
If you made this fudge, drop a comment below and let me know how it turned out. Ratings help others discover the recipe, and I’d love to hear your spin on it. Don’t forget to save it to Pinterest so you can easily find it whenever you need a quick, chocolatey treat!

Irresistible 15-Minute Chocolate Fudge (No Thermometer Needed)
Ingredients
- 2 cups 340g semisweet chocolate chips
- 1 14-ounce can sweetened condensed milk
- 2 tablespoons 28g unsalted butter
- 1 teaspoon vanilla extract
- 1/4 teaspoon salt
- Optional: 1/2 cup chopped nuts
- Optional: flaky sea salt for topping
Instructions
- Line an 8×8-inch pan with parchment paper, leaving an overhang for easy lifting.
- Melt chocolate chips, condensed milk, and butter in a saucepan over low heat, stirring constantly until smooth and glossy.
- Remove from heat and stir in vanilla extract and salt until combined.
- Fold in nuts if desired, then pour mixture into the prepared pan and smooth the top.
- Sprinkle with flaky sea salt and let set at room temperature for 2 hours or refrigerate for 1 hour.
- Lift from pan, cut into squares, and enjoy.
Notes
#Chocolate Fudge #Chocolate Fudge recipe #easy Chocolate Fudge