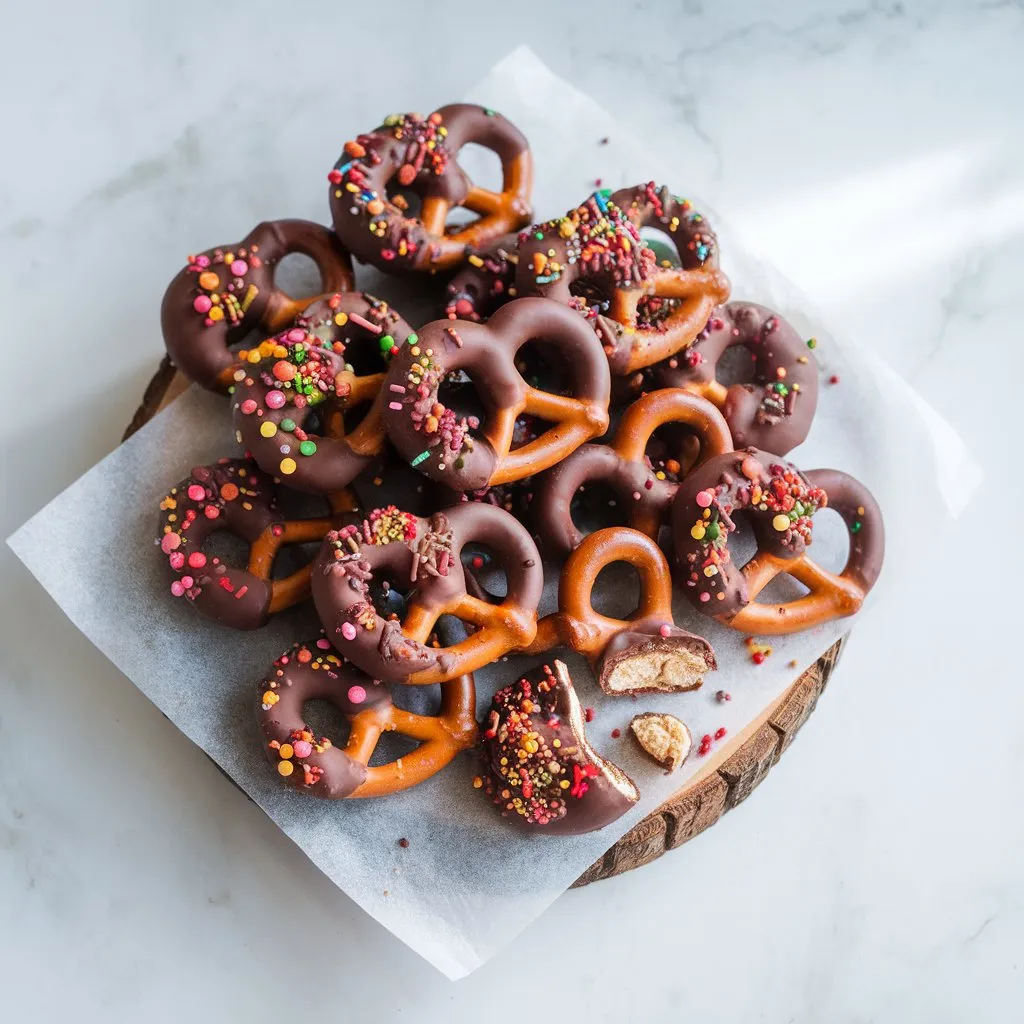
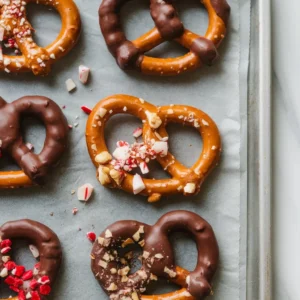
Chocolate covered pretzels are one of those rare snacks that check every box — salty, sweet, crunchy, creamy, fast, and wildly addictive. If you’ve never made them at home, let me tell you: you’re missing out on one of the easiest and most satisfying treats out there.
This is the kind of recipe you pull out when you need something impressive in a pinch. Whether you’re prepping party snacks, throwing together last-minute edible gifts, or just need a fix for that late-night sweet tooth, these little guys deliver. No oven. No fancy tools. Just chocolate covered pretzels and a few easy tweaks to make them look and taste pro.
If you’ve melted chocolate before or even just eaten a chocolate dipped anything, you can make these. And if you haven’t? You’re about to learn.
*Before You Start: You’ll find more explanation here than a basic recipe. That’s intentional—the aim is to educate, not just instruct.
Why You’ll Love This Recipe
➲ Only 3 ingredients needed: No digging through your pantry—just simple, everyday ingredients for a quick treat.
➲ Ready in 15 minutes: From start to snack in no time, perfect for last-minute cravings or quick dessert fixes.
➲ Customizable: Add sprinkles, drizzle, or crushed candy to make each pretzel unique and festive.
➲ Great for gifts or parties: Chocolate-covered pretzels look impressive without requiring hours in the kitchen, making them perfect for sharing.
➲ Zero baking required: Simply melt, dip, and let them cool—no oven needed.
➲ Kid-friendly: Little hands can help dip and decorate, making this a fun, interactive treat for all ages.
Ingredients

• 200g mini pretzels (salted twists work best, but pretzel rods also work)
• 200g chocolate (choose dark, milk, or white — chips or bars are fine)
Tip: Use high-quality chocolate for best flavor. Skip the candy melts unless you’re only after looks.
• 1 tbsp coconut oil or neutral oil (optional, helps smooth melting and shine)
You only need three basic ingredients to make classic chocolate covered pretzels at home.
• Optional toppings: Crushed peppermint, sprinkles, chopped nuts, mini M&Ms, or sea salt flakes
Notes:
• If you’re using white chocolate: keep the heat low, as it melts quickly and can burn faster than dark or milk chocolate.
• For a dairy-free version: choose vegan chocolate and double-check pretzel ingredients, since some varieties contain milk.
• Chocolate chips are convenient: they work well but can be slightly thicker when melted; adding a small amount of oil helps achieve a smooth, pourable consistency.
• Store finished pretzels: place them in an airtight container at room temperature, where they will stay fresh for up to 2 weeks.
Step-by-Step Instructions
➲ Prep your station
Line a baking sheet with parchment paper or wax paper to create a nonstick surface for your pretzels. Make sure to leave enough space between each one, as they’ll need room to cool and set without sticking together. This simple step ensures easy removal and keeps your chocolate-covered pretzels looking neat
➲ Melt the chocolate
Use a microwave-safe bowl or a double boiler.
Microwave method: Heat chocolate in 30-second bursts, stirring in between, until smooth. Add the oil halfway if using.
Stovetop method: Place chocolate in a heatproof bowl over a saucepan of simmering water (don’t let the bowl touch the water). Stir until melted and glossy.
Don’t overheat. Chocolate should be smooth, not scorched.
➲ Dip the pretzels
Drop each pretzel into the melted chocolate, using a fork to flip it until fully coated. Lift it out smoothly, let the extra chocolate drip away for a clean finish, then set it on the prepared sheet with care. Repeat the motion with calm precision—steady, consistent, efficient.

Want half-dipped? Hold one end and dip the other halfway before placing it down.
➲ Decorate (optional)
While the chocolate remains glossy and unset, swiftly apply your chosen toppings. Work with precision and speed — once the surface begins to firm, adhesion decreases. Timing is flavor; act before the window closes.
Match your theme: red/green for Christmas, pastel sprinkles for birthdays, crushed Oreos for cookies-and-cream vibes.

➲ Let them set
Allow the coated pretzels to rest undisturbed at room temperature for 30–45 minutes, enabling the chocolate to set naturally. For accelerated results, deploy refrigeration—10 to 15 minutes will achieve solidification efficiently. Maintain stability; do not stack until fully hardened.
💡 Fridge will speed it up but can cause slight bloom (white film) later. Totally fine to eat, just less pretty.
➲ Serve or store
When the chocolate coating has fully hardened, transfer the pretzels into an airtight container for optimal preservation. Maintain a dry, cool environment—avoid direct sunlight or heat sources to prevent melting or texture loss. Stability ensures perfection.
These stack well in jars or bags for gifting. Add a ribbon and you’re done.
Pro Tips
• Use a fork, not tongs for dipping: the fork grants superior precision and minimal disruption to the chocolate’s surface. Each movement remains controlled, resulting in a cleaner, more uniform coating that enhances both texture and presentation.
• Thin the chocolate with a touch of oil: if it becomes thick or begins to clump, add a few drops of neutral oil such as vegetable or coconut. This restores smooth, glossy fluidity, allowing the chocolate to glide evenly over each pretzel.
• Avoid crowding the tray: proper spacing is essential; each pretzel requires personal space to cool and set without merging into its neighbor. Think of it as chocolate choreography—every piece should stand proudly on its own.
• Add toppings immediately: the moment the chocolate hits cooler air, the setting process begins. Speed and precision ensure toppings adhere perfectly, locking in flavor and visual appeal before the surface hardens.
• Repurpose leftover chocolate: pour it into molds to create small treats, or drizzle it over popcorn for a quick gourmet upgrade. Efficiency is elegance in motion.
• For a clean, professional finish: tap the fork gently against the edge of the bowl before placing the pretzel on the tray. This controlled vibration releases excess chocolate, leaving a smooth, even shell once set—chef-level precision, flawlessly executed.

FAQs
➲ Can I freeze chocolate covered pretzels?
Yes, but with caution: the texture of the pretzels will remain stable, yet the chocolate coating may lose its shine or develop light spots from temperature changes. To protect quality, wrap the pretzels tightly in an airtight layer before freezing. When ready to enjoy, thaw them slowly at room temperature to reduce condensation and preserve that crisp, satisfying bite.
➲ Can I use different kinds of chocolate?
Absolutely: combine white and dark chocolate for a striking contrast, or gently swirl them together to create a marbled effect. Exercise caution with melting temperatures, as white chocolate heats quickly and can scorch if unattended. Careful control ensures both flavor and visual appeal shine.
➲ Can I double the recipe?
Yes, easily: use a larger bowl to give the pretzels plenty of room, or melt the chocolate in smaller batches to maintain smooth consistency. Work efficiently, as the chocolate begins to firm as it cools, and speed ensures an even, glossy coating on every piece.
➲ What if my chocolate seizes or clumps?
It’s likely water got in: chocolate seizes when even a small amount of moisture touches it. You can start over, or sometimes rescue it by adding a tiny bit of oil and stirring vigorously until smooth. Always ensure bowls and utensils are completely dry, and keep chocolate away from steam to prevent future issues.
Conclusion
Chocolate-covered pretzels are the ultimate low-effort, high-reward treat: perfect for snack trays, edible gifts, or a quick sweet fix. This recipe delivers every time — it’s fast, flexible, and effortless, requiring no fancy tools, no baking, and zero stress. You can customize them endlessly: mix white and dark chocolate for contrast, sprinkle with nuts, candies, or even a pinch of sea salt. They’re crunchy, sweet, and totally addictive, making them a guaranteed crowd-pleaser. Whether you’re making a few for yourself or a batch to share, these pretzels turn simple ingredients into something impressive in minutes.
• Strawberry Shortcake Ice Cream Bars
• Irresistible Potato Filled Pastry
Got a favorite topping combo? Drop it in the comments: I want to hear your creative twists! If you made this recipe, rate it and share a photo — I’d love to see your version. And don’t forget to save this recipe to Pinterest so you can easily find it for your next chocolate-covered pretzel adventure! #Chocolate Covered Pretzels #Chocolate Covered Pretzels recipe
Chocolate Covered Pretzels
Ingredients
- 200 g mini salted pretzels
- 200 g dark or milk chocolate chopped
- 1 tbsp coconut oil optional
- Sprinkles crushed peppermint, or chopped nuts (optional)
Instructions
- Line a baking sheet with parchment paper.
- Melt the chocolate and coconut oil in a microwave or double boiler until smooth.
- Dip each pretzel into the melted chocolate, coating evenly.
- Place the coated pretzels on the lined sheet.
- Add sprinkles or toppings before the chocolate sets.
- Let pretzels harden at room temperature or chill for 10–15 minutes.
- Store in an airtight container once set.