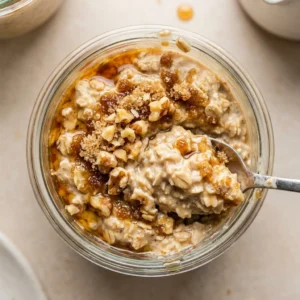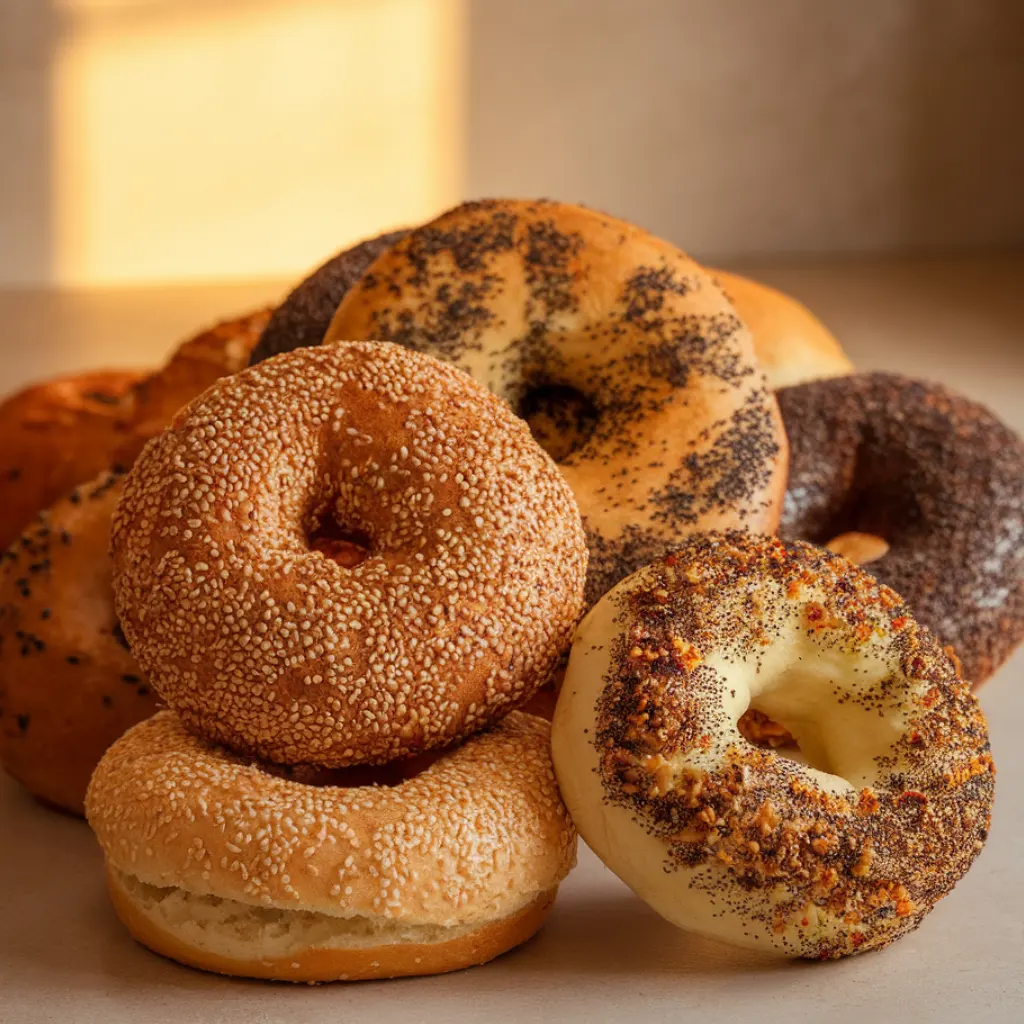
Look, finding a New York Style Gluten Free Bagel recipe that doesn’t taste like a sad hockey puck has been my personal quest for three years. After going gluten-free, the thing that crushed me most wasn’t giving up pasta or cake—it was losing my Sunday morning ritual of a hot, chewy bagel loaded with cream cheese and lox.
Most gluten-free bagel recipes out there are lying to you. They promise “just like the real thing” and deliver something closer to a deflated bread roll. The problem? They’re treating gluten-free baking like a simple flour swap, when bagels need specific techniques to get that signature dense chew and shiny golden crust.
*Before You Start: You’ll find more explanation here than a basic recipe. That’s intentional—the aim is to educate, not just instruct.
Why Your Sunday Mornings Deserve This
❃ Real bagel texture: Dense, chewy, with that perfect resistance when you bite through
❃ No weird aftertaste: None of that bean flour bitterness or gritty texture
❃ Beginner-friendly: One bowl, no fancy equipment, clear instructions
❃ Make ahead for busy mornings: Shape tonight, boil and bake tomorrow
❃ Freezer champion: Stash a batch for bagel emergencies (they happen)
❃ Topping playground: Everything seasoning, sesame, poppy seeds, or plain Jane
The Goods You’ll Need to Bake
For the Bagels:
• 300g gluten-free all-purpose flour blend (Bob’s Red Mill 1-to-1 or King Arthur Measure for Measure—trust me, the brand matters here)
• 100g sweet rice flour (sometimes labeled “mochiko”, grab it from the Asian food aisle for way cheaper)
• 2 tablespoons psyllium husk powder (this is your glue, don’t skip it)
• 2 teaspoons instant yeast (the little granules, not the packets that need proofing)
• 1 tablespoon sugar (yeast food and browning magic)
• 2 teaspoons fine sea salt
• 360ml warm water (should feel like a comfortable bath on your wrist)
• 2 tablespoons neutral oil (avocado or grapeseed)
• 1 large egg white, beaten (for that Instagram-worthy shine)

For the Boiling Bath:
• 2 quarts water
• 2 tablespoons baking soda (this is what makes bagels bagels)
• 1 tablespoon honey (optional but recommended—adds depth)
Toppings (your choice):
• Everything bagel seasoning, sesame seeds, poppy seeds, dried onion, coarse salt, or nothing at all
Quick Notes: That sweet rice flour? Non-negotiable. Regular rice flour won’t give you the chew. Yes, it’s an extra purchase, but one bag lasts forever and transforms your gluten-free baking game. Also, if your psyllium powder has a purple tint, don’t panic, it bakes out and nobody will ever know.
Let’s Bake: Easy Steps to Perfect Bagels
1 Mix the dry ingredients and start the dough.
Dump both flours, psyllium powder, yeast, sugar, and salt into a large bowl. Give it a quick whisk to combine. Make a little well in the center (like a volcano) and pour in your warm water and oil. Grab a wooden spoon and stir everything together until it forms a shaggy, rough-looking dough. Let it sit for 5 minutes—the psyllium needs time to wake up and start binding everything.

2 Knead it out.
Here’s where gluten-free gets different. Forget everything you know about traditional bread dough. This won’t become smooth and elastic, and that’s fine. Knead it right in the bowl with your hands for about 3-4 minutes. You’re looking for it to come together into a cohesive ball that’s slightly tacky but not sticky. If it’s wet and clingy, sprinkle in more flour one tablespoon at a time. If it’s dry and cracking, add water by the teaspoon. Cover with a damp towel and let it rise somewhere warm for 45 minutes.
3 Shape your bagels.
Line a baking sheet with parchment and give it a light oil slick. Once your dough has puffed up nicely, turn it out onto your counter (no flour needed). Divide it into 8 pieces—eyeball it or use a scale if you’re fancy. Roll each piece into a smooth ball by cupping your hand over it and moving in circles. This takes maybe 15 seconds per ball.

4 Punch the holes.
This is oddly satisfying. Take each ball and jam your thumb straight through the center. Then gently spin the ring around your fingers, stretching that hole until it’s about 2 inches wide. Yes, it looks comically large. Trust the process—those holes shrink like crazy during rising and baking. Place them on your baking sheet, cover loosely with plastic wrap, and let them rest for 20 minutes.
5 Get your water boiling.
Preheat your oven to 425°F. Fill a large pot with water, add the baking soda (it’ll fizz up—science!), and bring it to a boil, then reduce to a gentle simmer. This alkaline bath is the secret to that chewy, slightly shiny bagel crust. Don’t skip it or you’re just making round bread.
6 Boil time.
Working in batches of 2-3 so they have room to float, carefully lower the bagels into the simmering water. Boil 45 seconds, flip them with a slotted spoon, then another 45 seconds. They’ll puff up slightly and look all glossy. Lift them out, let the water drain, and put them back on the baking sheet. Immediately brush with egg white and hit them with your toppings—the egg white is wet glue.

7 Bake until golden and gorgeous.
Into the oven for 22-25 minutes, rotating the pan halfway through. You want a deep golden-brown color on top and a firm crust. When you tap the bottom, it should sound hollow. Let them cool on the pan for 5 minutes (patience!), then transfer to a cooling rack. They’re technically ready to eat now, but letting them cool for at least 20 minutes helps the texture set properly.

8 Storage wisdom.
Room temperature in a paper bag for 2 days max. After that, they get stale fast. Better plan? Slice them in half as soon as they’re cool, then freeze in a freezer bag. Pop them straight from frozen into the toaster whenever you need a bagel fix. This New York Style Gluten Free Bagel freezes like a dream and tastes bakery-fresh after toasting.
The Little Things That Make a Big Difference
❃ Your kitchen temperature matters more than you think. Gluten-free dough is fussy about warmth. If it’s winter and your kitchen is cold, that dough will take forever to rise and might not puff up properly. Stick your bowl in the oven with just the light on, or near a warm (not hot) stovetop. Aim for that 75-80°F sweet spot.
❃ Double egg white = double shine. Want that professional bakery gloss? Brush with egg white, add toppings, bake for 10 minutes, then brush again. It’s an extra step but the results are showstopping.
❃ The boiling isn’t optional. Some recipes say you can skip it. They’re wrong. That quick dip in alkaline water gelatinizes the exterior starches and creates the barrier between chewy crust and soft interior. It’s literally what makes a bagel a bagel instead of a donut-shaped bread roll.
❃ Invest in a kitchen scale. Cup measurements for gluten-free flour are chaos. Depending on how you scoop, you could be off by 30 grams, which means dense bricks or flat puddles. A $15 scale solves this forever.
❃ Slice carefully when fresh. Right out of the oven, these are tender. Use a sharp serrated knife with a gentle sawing motion. Once they’re toasted or day-old, they’re much sturdier.

Nutrition at a Glance: Bagel Edition
• Calories: 245
• Total Carbohydrates: 48g
• Protein: 5g
• Total Fat: 4g
• Fiber: 6g
• Sugar: 2g
• Sodium: 685mg
❃ These numbers are estimates based on the ingredients listed. Your actual nutrition may vary depending on brands and any modifications you make.
Your Bagel Questions, Answered
➲ Can I use a different flour blend?
Technically yes, but your results will be all over the place. Some blends have bean flours that taste bitter, others lack the structure you need. The magic here is the combo of a good all-purpose blend PLUS that sweet rice flour. The sweet rice adds stretch and chew that regular gluten-free flour can’t deliver. If you absolutely must substitute the sweet rice flour, try tapioca starch, but expect less authentic texture.
➲ Help! My bagels came out like hockey pucks.
Nine times out of ten, this is a yeast problem. Check the expiration date on your yeast—old yeast is dead yeast. Also, water temperature is crucial. Too hot (over 120°F) kills the yeast instantly. Too cold (under 100°F) and it won’t activate properly. Use your finger to test—it should feel warm but not hot. Finally, make sure you gave the dough enough time to rise in a warm spot.
➲ Are these dairy-free?
Yep! There’s no butter, milk, or cheese in the bagels themselves. Just watch your toppings and spreads if dairy’s an issue for you.
➲ Why do my holes disappear?
You’re not making them big enough initially. Seriously, make them look ridiculously large—like 2 full inches across. They’ll shrink by half during the final rise and baking. Also, make sure you’re not over-proofing the dough, which makes it collapse on itself.
You Made It: Now Enjoy!
After all those failed attempts, burnt batches, and “creative experiments” that went straight to the trash, perfecting this New York Style Gluten Free Bagel recipe feels like cracking a code. Now Sunday mornings feel right again—hot bagel, schmear of cream cheese, strong coffee, and zero stomach issues afterward.
You may also like my:
❃ Double Chocolate Chip Bagel Recipe (Better Than Store-Bought!)
❃ Easy Asiago Bagel Recipe (Better Than Store-Bought!)
❃ Homemade Bagel Recipe | Easy New York–Style (Ready in 3H!)
❃ Homemade Gluten Free Bagels in 2 Hours (Finally!)
Your turn: What’s going on your first batch? Everything seasoning? Plain with butter? Loaded breakfast sandwich? Drop a comment and let me know how they turn out. And if these bagels finally scratch that bagel itch you’ve been missing, share this recipe with someone who needs it. And also pin it to Pinterest. Sometimes the best recipes are the ones that bring back what you thought was gone forever.

The ONLY New York Style Gluten Free Bagel Recipe You Need
Ingredients
- 300 g gluten-free all-purpose flour blend Bob’s Red Mill 1-to-1 or King Arthur Measure for Measure
- 100 g sweet rice flour mochiko
- 2 tablespoons psyllium husk powder
- 2 teaspoons instant yeast
- 1 tablespoon granulated sugar
- 2 teaspoons fine sea salt
- 360 ml warm water 105-110°F
- 2 tablespoons neutral oil avocado or grapeseed
- 1 large egg white beaten, for brushing
- 2 quarts water for boiling
- 2 tablespoons baking soda
- 1 tablespoon honey optional
- Everything bagel seasoning or toppings of choice optional
Instructions
- Whisk together both flours, psyllium husk powder, yeast, sugar, and salt in a large bowl. Add warm water and oil to the center. Stir until a shaggy dough forms. Let rest 5 minutes.
- Knead dough in the bowl for 3-4 minutes until it comes together (tacky but not sticky). Cover with a damp towel and let rise in a warm spot for 45 minutes until doubled.
- Divide dough into 8 equal pieces. Roll each into a smooth ball. Press your thumb through the center and stretch the hole to 2 inches wide. Place on oiled parchment paper. Cover and rest 20 minutes.
- Preheat oven to 425°F. Bring water and baking soda to a boil, then reduce to simmer. Boil bagels 2-3 at a time for 45 seconds per side. Return to baking sheet.
- Brush bagels with beaten egg white and add toppings. Bake 22-25 minutes until deep golden brown, rotating pan halfway through. Cool on pan 5 minutes, then transfer to wire rack.