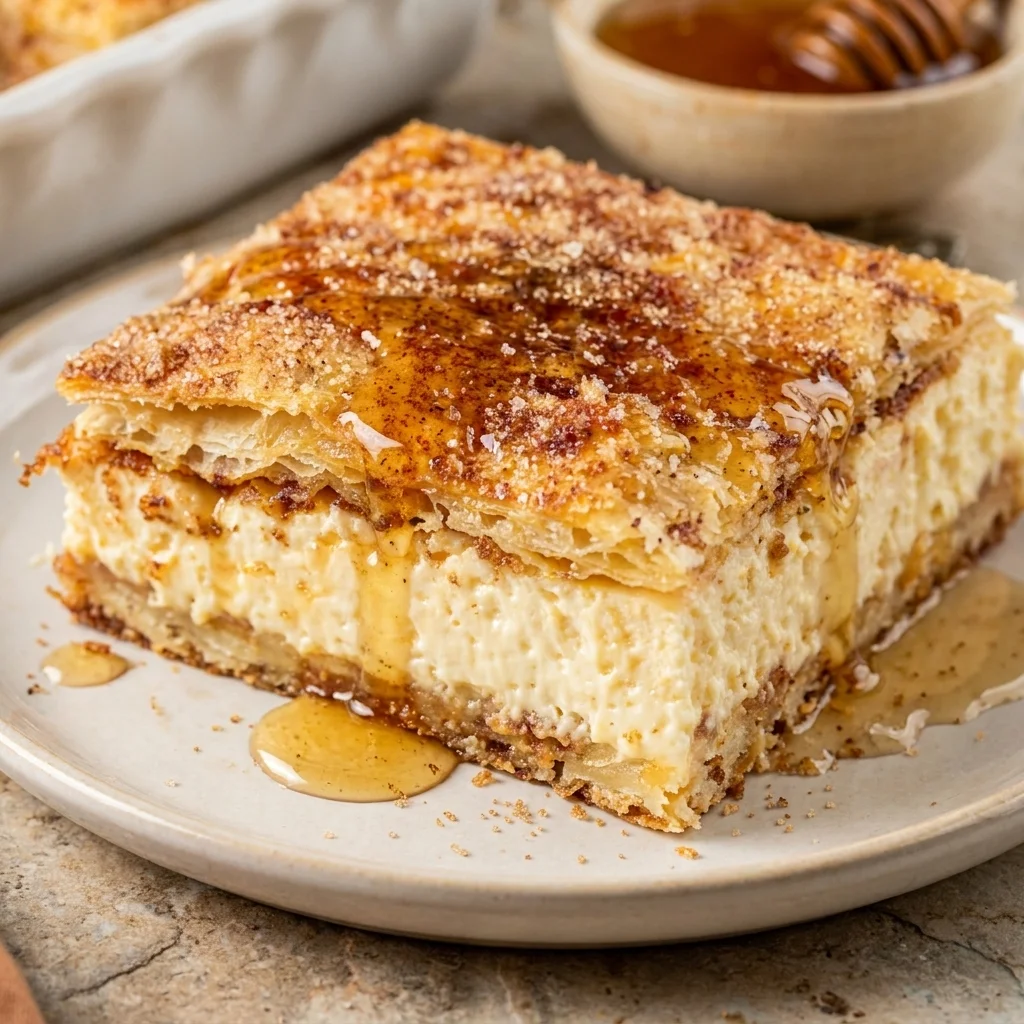
This sopapilla cheesecake has become my absolute favorite dessert when someone asks me to bring something to a gathering. It has all that warm cinnamon sugar goodness you crave from traditional sopapillas, but wrapped around the creamiest cheesecake filling you’ve ever tasted.
And the best part? You can make this entire thing using refrigerated crescent roll dough. No deep frying. No complicated pastry work.
Those buttery, flaky crescent roll layers meet a rich cream cheese center, and the result is something special. You get this incredible contrast of textures that somehow tastes way fancier than the ridiculously simple ingredient list suggests. Perfect for when you need to feed a crowd without spending your whole weekend in the kitchen.
This sopapilla cheesecake travels like a dream, cuts cleanly, and honestly gets even better after sitting overnight in the fridge. That’s my kind of dessert.
*Before You Start: You’ll find more explanation here than a basic recipe. That’s intentional—the aim is to educate, not just instruct.
Why You’ll Be Proud Bringing This to Any Gathering
❀ Takes just 30 minutes total: Yes, you heard that right! This recipe is ready from start to finish in only half an hour, bake time included. It’s perfect for busy days when you want something homemade, comforting, and impressive without spending all day in the kitchen.
❀ Uses ingredients you already have: No fancy or hard-to-find items here. Everything you need is probably already sitting in your pantry or fridge. Simple ingredients that come together to make something seriously delicious.
❀ Feeds a crowd with one pan: One pan is all you need to make enough for about 15 people. It’s ideal for family gatherings, potlucks, or any time you need to feed a hungry group with minimal effort and cleanup.
❀ Gets even better overnight: Make it ahead and let the flavors develop while it rests. By the next day, everything blends beautifully, making it taste even richer and more satisfying.
❀ Perfect for beginners: This recipe is almost impossible to mess up. It’s easy, forgiving, and always turns out great, which makes it perfect for anyone still finding their way around the kitchen.
❀ Tastes luxurious without the effort: The flavor is so rich and well-balanced that everyone will think you spent hours cooking. It’s simple, impressive, and absolutely worth making again and again.
What You’ll Need to Pull This Off
For the Base Layer:
• 2 tubes (8 oz each) refrigerated crescent roll dough. Pillsbury is my go-to here. Skip the reduced-fat versions, they just don’t give you those buttery, flaky layers we’re after
• 1/2 cup butter, melted. real butter only, please. Margarine just doesn’t cut it for this

For the Cheesecake Filling:
• 2 packages (8 oz each) cream cheese, softened: this is where patience pays off. Leave it out for 2-3 hours, or zap it in the microwave for 15-second intervals if you’re in a rush
• 1 cup granulated sugar: just the right amount of sweetness without making your teeth hurt
• 1 teaspoon vanilla extract: splurge on the real stuff if you can. Your taste buds will thank you
• 2 large eggs: room temperature works better, but don’t stress if you forget to take them out early
For the Cinnamon Sugar Topping:
• 1/2 cup granulated sugar: save this for the grand finale
• 2 teaspoons ground cinnamon: fresh cinnamon makes such a difference if you’ve got it
• 1/4 cup butter, melted: helps that cinnamon sugar stick where it belongs
Quick tip: Cut your cream cheese into chunks and let it sit for about 30 minutes if you forgot to soften it ahead of time. Those crescent roll tubes are pretty forgiving on dates too, which makes this perfect for last-minute dessert emergencies.
Here’s Exactly How to Bring It Together
⤷ Preheat your oven to 350°F and grease that 9×13 pan like your life depends on it. Seriously, don’t skip the greasing step, nothing ruins the day like half your dessert stuck to the bottom of the pan. Parchment paper is your friend here if you want those magazine-worthy clean cuts later.
⤷ Unroll the first tube of crescent dough and press it into the bottom of your pan. Pinch those seam lines together to make one solid piece. The dough should reach the edges but doesn’t need to climb the sides. Got some gaps? Just stretch it gently, this stuff is pretty forgiving.
⤷ Brush that bottom crust with half your melted butter. This isn’t optional, it’s what keeps your bottom layer from turning into a soggy mess. Use a pastry brush if you’re fancy, or just drizzle and spread with the back of a spoon like the rest of us.
⤷ Beat your cream cheese until it’s completely smooth and fluffy. This takes about 2-3 minutes with an electric mixer, and trust me, those extra minutes matter. Any lumps you leave in will show up in your final dessert, and nobody wants chunky cheesecake.

⤷ Mix in the sugar, vanilla, and eggs until just combined. Don’t go crazy here, overmixing makes the filling dense instead of light and creamy. You want it smooth and pale yellow, then stop.
⤷ Spread the filling over your bottom crust, getting it all the way to the edges. An offset spatula makes this easier, but a regular spoon works fine too. You want about a half-inch layer across the whole pan.

⤷ Carefully lay the second tube of dough over the filling. Stretch it to cover everything, pinch the seams, and don’t worry about making it perfect. The rustic look is part of this sopapilla cheesecake’s charm.
⤷ Brush the top with your remaining butter, then go nuts with that cinnamon sugar mixture. Press it down lightly so it actually sticks during baking. This is what gives you that signature sopapilla coating that gets all golden and slightly crispy.
⤷ Bake for 25-30 minutes until the top looks golden and the center doesn’t jiggle when you shake the pan. If the edges start browning too fast, throw some foil over the top for the last 10 minutes. Better safe than burnt.

These Are the Steps You Don’t Want to Skip
❀ Get your ingredients to room temperature first: Cold cream cheese is the enemy of smooth filling. Take it out a few hours early, or cut it into chunks and let it sit for 30 minutes. Your mixer (and your arms) will thank you.
❀ Don’t skip the butter layers: That melted butter isn’t just for flavor, it creates barriers that keep everything from turning into a soggy mess. It’s the difference between a professional-looking dessert and something that falls apart when you cut it.
❀ Let it cool completely before cutting: This is where patience pays off big time. The filling firms up as it cools, which means clean cuts instead of gooey disasters. Overnight in the fridge makes it even better.
❀ Use a sharp knife dipped in warm water: Wipe it clean between cuts, and you’ll get those perfect squares that look like you actually know what you’re doing in the kitchen.
❀ Make it ahead: This sopapilla cheesecake actually improves after a day in the fridge. The flavors meld together, and the texture becomes even more luscious.
Questions You’ll Probably Ask (and the Answers You Need)
➲ Can you make this ahead of time?
Absolutely, and you should! This tastes way better after sitting overnight in the fridge. The flavors get a chance to mingle, and the texture becomes incredible. Make it up to 2 days ahead, cover it tight with plastic wrap, and you’re golden.
➲ What’s the deal with reheating leftovers?
Honestly? Don’t. This sopapilla cheesecake is perfect straight from the fridge—the contrast between the flaky crust and cold, creamy filling is what makes it special. If you must warm it up, 10-15 seconds in the microwave max, or you’ll end up with soup.
➲ Can you freeze this thing?
You can, but wrap individual pieces really well in plastic wrap and foil. It’ll keep for about 3 months. Thaw it in the fridge overnight, and while the texture changes a bit, it still tastes great.
➲ What if the crescent roll dough tears while you’re working with it?
Don’t panic—just pinch it back together and keep going. The homemade, slightly imperfect look is actually part of the charm. If you’ve got big holes, steal some dough from the edges to patch things up.
Final Thoughts Before You Go Turn On the Oven
This sopapilla cheesecake has become one of those recipes that just works. It’s the dessert that shows up to every potluck, every family gathering, every “can you bring something sweet” situation. The fact that it uses simple ingredients and comes together in 30 minutes is just the bonus—it’s really about that perfect combination of flaky, creamy, and cinnamon-sugary that hits all the right spots.
If you’re looking for more crowd-pleasers that don’t require culinary school training, check out our:
❀ Easy Asiago Bagel Recipe (Better Than Store-Bought!)
❀ Creamy Banana Matcha Smoothie Recipe (5-Minute Energy Boost)
❀ Easy Pineapple Smoothie Recipe (Ready in 3 Minutes!)
❀ The Best Fluffy Gluten Free Pancakes (Ready in 15 Minutes!)
Try this sopapilla cheesecake and let me know how it goes! Drop a comment below with your results, or tag me on Instagram @hdrecipe.co I love seeing how these recipes work out in real kitchens with real families. #Sopapilla Cheesecake recipe #easy Sopapilla Cheesecake #Sopapilla Cheesecake #Sopapilla Cheesecake #Sopapilla Cheesecake dessert

Sopapilla Cheesecake
Ingredients
- 2 tubes 8 oz each refrigerated crescent roll dough
- 2 packages 8 oz each cream cheese, softened
- 1 cup granulated sugar
- 1 teaspoon vanilla extract
- 2 large eggs
- 1/2 cup butter melted (divided)
- 1/2 cup granulated sugar for topping
- 2 teaspoons ground cinnamon
Instructions
- Preheat oven to 350°F and grease a 9×13 pan.
- Press one tube of crescent dough into the bottom to form a solid crust.
- Beat cream cheese, sugar, vanilla, and eggs until smooth, then spread the mixture evenly over the dough.
- Lay the second dough sheet on top, brush with melted butter, and sprinkle with cinnamon sugar.
- Bake 25–30 minutes until golden and set.
- Cool completely before cutting for clean slices.