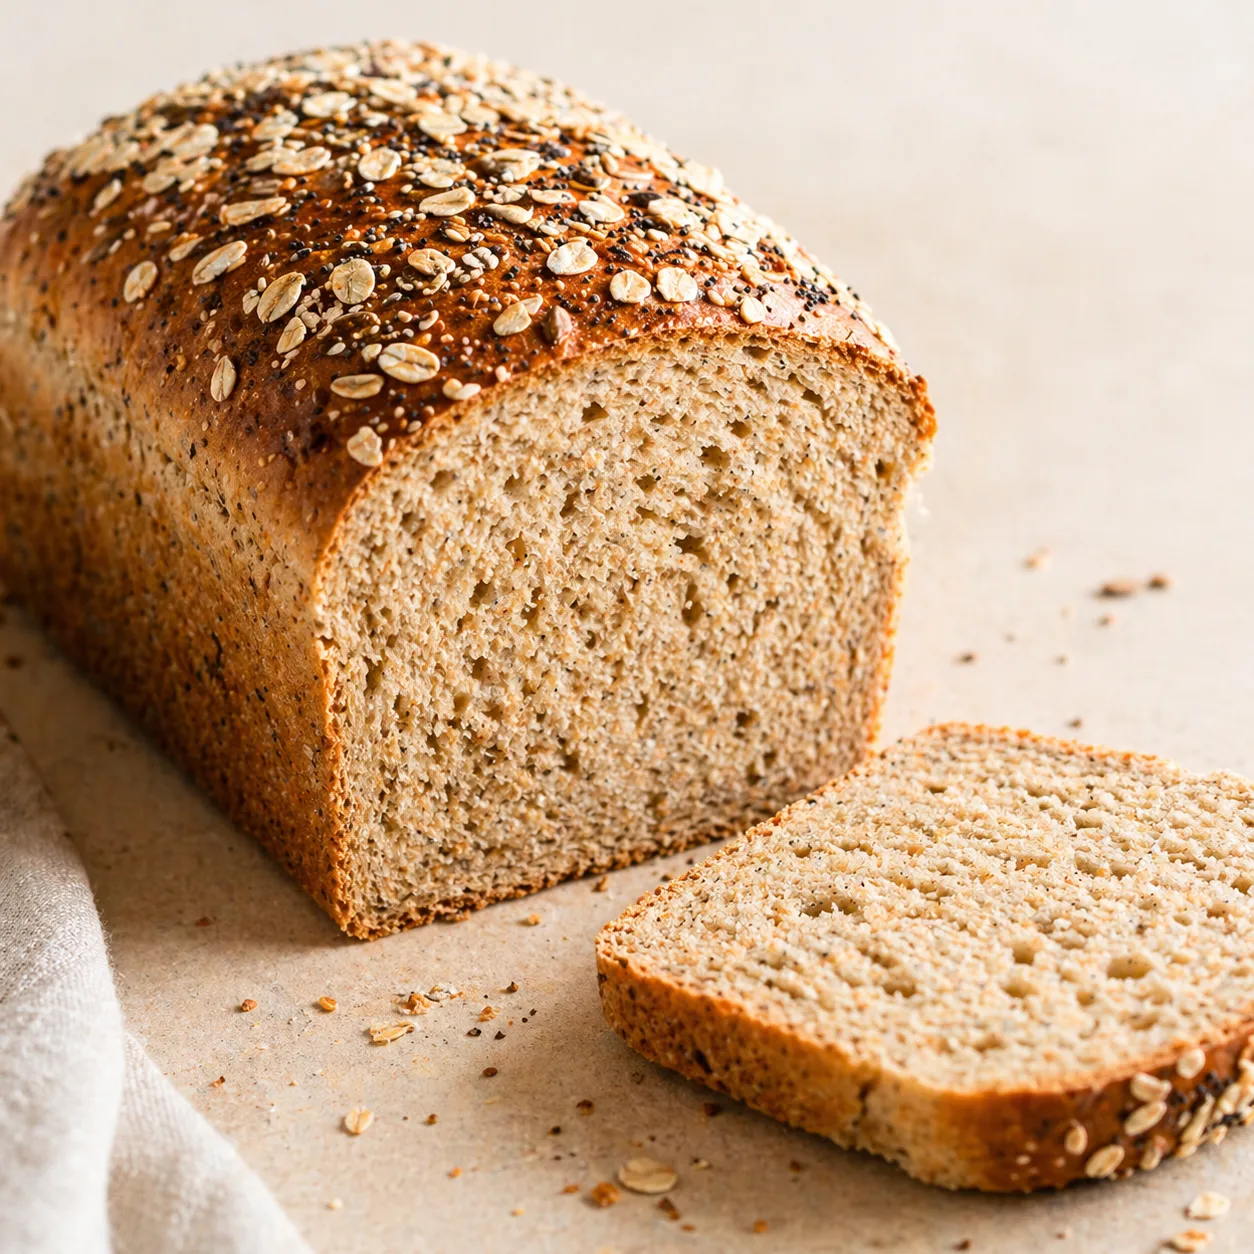
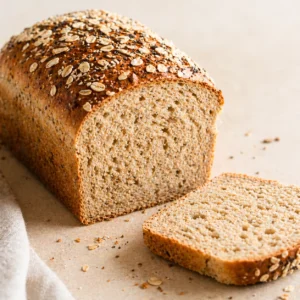
Gluten free bread that actually tastes like real bread. No gummy centers. No dry crumbs. No total lack of flavor. This recipe changes all of that.
You get a soft, chewy interior, a golden crackly crust, and flavor that makes you forget it is gluten free. No xanthan gum. No complicated twenty step processes. No guesswork. Just reliable, delicious bread every single time.
This loaf rises beautifully. Slices perfectly. Works for sandwiches, toast, or eating straight from the pan with a little butter. Bake it once and it will earn a permanent spot in your weekly rotation.
So preheat your oven and dust off that loaf pan. Gluten free bread is about to get a serious upgrade. And you are the one holding the recipe.
*Before You Start: You’ll find more explanation here than a basic recipe. That’s intentional—the aim is to educate, not just instruct.
Why You’ll Love This Gluten Free Bread
➲ No gums or weird binders: This recipe relies on psyllium husk to give the bread structure and softness, so you skip the gut-irritating additives often found in gluten-free loaves. You get a tender, cohesive crumb that holds together without feeling artificial.
➲ One bowl, no mixer: No need for fancy gadgets or multiple bowls. Everything comes together in a single bowl with just a spoon and some elbow grease. Minimal cleanup, maximum satisfaction.
➲ Freezer-friendly: Make a double batch and store some in the freezer. When thawed, the bread stays soft and fresh, perfect for quick breakfasts, sandwiches, or last-minute meals.
➲ Neutral and versatile: The flavor is simple and clean, making it perfect for any use, toast in the morning, sandwiches at lunch, or dunked into soup at dinner. This loaf is a blank canvas for all your favorite toppings and spreads.
➲ Actually tastes like bread: Finally, gluten-free bread that isn’t dense, dry, or masquerading as cake. Soft, chewy, and satisfying, every slice tastes genuinely like bread, not a compromise.
Ingredients

Dry:
• 2 cups (240g) gluten free all-purpose flour. Use one with xanthan gum already included (like Bob’s Red Mill 1:1). If yours doesn’t have it, add 1/2 tsp or use the psyllium-only method below.
• 1/2 cup (60g) almond flour. Substitute: oat flour or sunflower seed flour for nut-free
• 1 tbsp psyllium husk powder
• 2 tsp baking powder
• 1 tsp salt
Wet:
• 1 1/4 cups (300ml) warm water (100°F / 38°C)
• 1 tbsp apple cider vinegar
• 1 tbsp olive oil
• 2 tsp maple syrup (or honey if not strictly vegan)
Optional Toppings:
• 1 tbsp sesame seeds, sunflower seeds, or oats
Let’s Make It Together! Step by Step
➲ Preheat and prep.
Preheat your oven to 375°F (190°C) so it’s fully ready when your dough is mixed. Line an 8×4-inch loaf pan with parchment paper for easy removal, or lightly grease it if you prefer. This simple prep ensures your bread comes out cleanly without sticking and keeps the crust perfect.
➲ Mix the dry stuff.
In a large mixing bowl, combine the gluten-free flour, almond flour, psyllium husk, baking powder, and salt. Whisk everything thoroughly to break up any lumps and ensure an even distribution of the ingredients. This step is key for a consistent texture and a loaf that rises beautifully without dense spots.

➲ Combine the wet ingredients.
In a separate bowl or a large measuring cup, whisk together the warm water, apple cider vinegar, olive oil, and maple syrup until fully combined. The warmth of the water helps activate the psyllium husk later, while the vinegar adds a subtle lift and depth of flavor. Give it a good stir so everything is evenly mixed before adding it to your dry ingredients.
➲ Bring it together.
Pour the wet ingredients into the bowl with your dry mixture. Stir thoroughly until a thick, sticky dough forms. It will feel a bit looser than traditional bread dough, that’s completely normal for gluten-free recipes. Let the dough rest for 5–10 minutes; this allows the psyllium husk to fully hydrate and the mixture to thicken, giving you a soft, cohesive loaf that slices beautifully once baked.
Pro tip : Psyllium husk absorbs liquid over time. That short resting period makes a big difference in structure.
➲ Shape and top.
Scoop the sticky dough into your prepared loaf pan, spreading it evenly. Dip a spatula in water to smooth the top without sticking, it helps create a neat, even crust. If you’d like, now’s the time to add toppings like seeds, oats, or a sprinkle of sea salt for extra texture and flavor. This step sets your loaf up for a beautiful rise and an inviting, golden finish.
➲ Bake.
Place the loaf in the preheated oven and bake for 55–65 minutes. You’re looking for a golden-brown top that’s slightly cracked and firm to the touch. To check doneness, insert a toothpick into the center, it should come out clean, without any wet batter. This ensures the loaf is fully cooked while keeping the crumb tender and soft.
Bonus tip : If you have a kitchen thermometer, the center should read 200–205°F (93–96°C). That’s how you avoid underbaked, gummy bread.
➲ Cool completely.
Resist the urge to cut into your bread right away! Let it cool in the pan for about 10 minutes to firm up slightly, then carefully lift it out using the parchment and transfer it to a wire rack. Allow it to cool for at least 1 hour. Cutting too soon traps steam inside the loaf, which can make the crumb gummy and dense. Patience here ensures a soft, airy texture and perfect slices every time.
➲ How to Store It
This bread stays fresh at room temperature for up to 2 days. Store it in a sealed bag or wrap it in foil. For longer shelf life, slice it and freeze with parchment between slices. It toasts straight from the freezer like a dream.
Tiny Details That Make a Big Difference
❃ Weigh Your Ingredients: Gluten-free flour blends vary a lot in volume, so using a kitchen scale ensures consistency every time. This small step makes a big difference in texture and rise.
❃ Let It Sit Before Baking: Those 5–10 minutes of resting aren’t optional, they allow the psyllium husk to fully hydrate and build structure. Rushing this step can lead to a denser loaf.
❃ Add Herbs or Spices: Customize your bread with dried rosemary, garlic powder, caraway seeds, or other favorite flavors. It’s an easy way to elevate a simple loaf without extra effort.
❃ Use Parchment Paper: Lining your pan guarantees a clean release and keeps cleanup easy—never underestimate the power of this small step.
❃ Don’t Expect a Huge Rise: Gluten-free dough behaves differently than wheat-based dough. Your loaf will puff slightly, but it won’t rise like sourdough or traditional bread. That’s completely normal, and the crumb will still be soft and chewy.
Got Questions? I’ve Got You Covered
➲ Can I make this bread ahead of time?
This gluten-free bread keeps well for up to 2 days at room temperature and up to 5 days in the fridge. For longer-term storage, slice the loaf and freeze the pieces. Thawed slices maintain their soft, chewy texture, making it easy to enjoy fresh bread anytime without baking a new loaf.
➲ How do I reheat it?
You can toast slices straight from the fridge or freezer for a quick, warm bite. If you want to enjoy a full loaf, wrap it in foil and reheat in the oven at 300°F (150°C) for 10–15 minutes. This gently warms the bread without drying it out, keeping the crumb soft and the crust tender.
➲ What’s a good substitute for almond flour?
You can swap in oat flour, sorghum flour, or sunflower seed flour if you like. Each will slightly change the texture and crumb, but they still work beautifully, giving you flexibility depending on what you have on hand or your flavor preferences.
➲ Why is my bread gummy in the middle?
The two most common reasons are underbaking or slicing the loaf before it cooled completely. Always bake until the internal temperature reaches 200°F (93°C) and allow the bread to cool fully on a wire rack. This ensures the crumb sets properly and your slices come out soft, airy, and never gummy..

A Sweet Ending! Literally and Figuratively
This isn’t your typical “just eat salad” kind of gluten-free blog. We focus on real, satisfying recipes that are approachable, flavorful, and actually work, so you can enjoy bread, desserts, and hearty meals without compromise.
If you liked this bread, you’ll love these:
• How to Make Scooby Snack Shot
• How to Make Gender Reveal Cake
Don’t forget to save this gluten-free bread recipe to Pinterest so you can easily find it anytime you want a reliable, soft, and flavorful loaf. We test every recipe carefully to make sure it works perfectly, so you can skip the trial-and-error and enjoy delicious results without wasting time or ingredients.
Gluten Free Bread Gluten Free Bread Gluten Free Bread Gluten Free Bread Gluten Free Bread Gluten Free Bread
Gluten Free Bread
Ingredients
- 2 cups 240g gluten free all-purpose flour
- 1/2 cup 60g almond flour
- 1 tbsp psyllium husk powder
- 2 tsp baking powder
- 1 tsp salt
- 1 1/4 cups 300ml warm water
- 1 tbsp apple cider vinegar
- 1 tbsp olive oil
- 2 tsp maple syrup
- 1 tbsp sesame or sunflower seeds optional
Instructions
- Preheat oven to 375°F (190°C) and line an 8×4-inch loaf pan.
- In a large bowl, whisk the dry ingredients.
- In another bowl, mix warm water, vinegar, oil, and maple syrup.
- Pour wet into dry and stir until thick. Let sit 10 minutes.
- Transfer dough to the pan, smooth the top, and sprinkle seeds if desired.
- Bake 55–65 minutes until golden and firm.
- Cool in the pan 10 minutes, then fully on a rack before slicing.