If you’re planning a gender reveal, forget the smoke bombs and confetti poppers—this gender reveal cake steals the show, and it actually tastes amazing. With just five simple steps, you’ll bake and assemble a cake that hides a sweet, colorful surprise inside. No fancy decorating skills required—just basic baking tools, a bit of patience, and a sense of fun.
You’re here because you want a cake that looks impressive, works the first time, and won’t eat up your whole weekend. Let’s make that happen, step by step, so your reveal is memorable, delicious, and stress-free.
Why You’ll Love It
❃ Instant crowd-pleaser: One slice, and everyone’s cheering—or maybe shedding a happy tear. This cake makes the reveal moment unforgettable.
❃ No fancy gear required: You don’t need professional tools. A couple of basic pans and a mixer are all it takes to pull off a flawless cake.
❃ Customizable for any flavor or theme: Vanilla, chocolate, lemon—pick your favorite or match the party theme. You can also play with frosting colors, layers, or fillings for extra fun.
❃ Perfect for DIY baby showers: It looks impressive but isn’t intimidating, making it ideal for hosting at home.
❃ Make it ahead, stress less: Both the cake and frosting hold up beautifully in the fridge, so you can prep in advance and enjoy the celebration without last-minute panic.
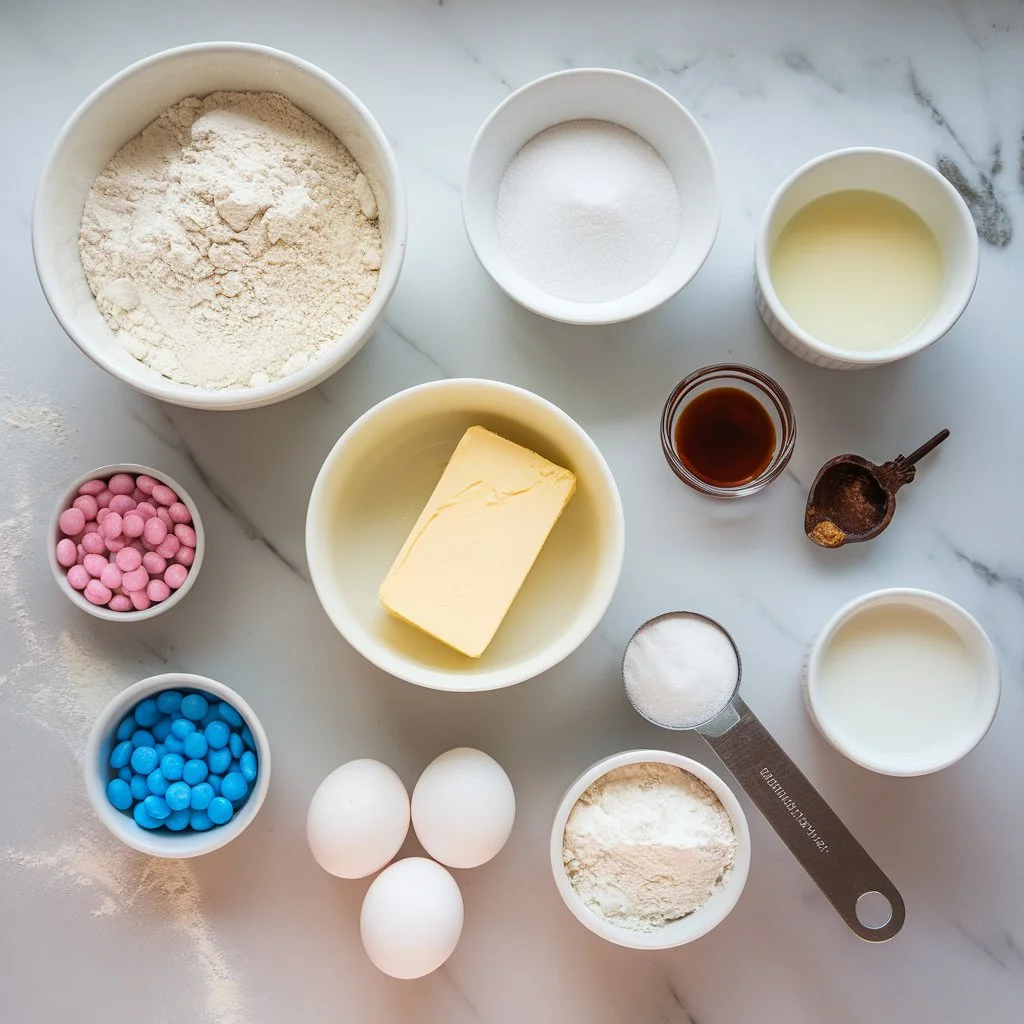
Ingredients Of The gender reveal Cake
For the Cake
• 2 ½ cups all-purpose flour
• 2 ½ tsp baking powder
• ½ tsp baking soda
• ½ tsp salt
• ¾ cup unsalted butter, room temp
• 1 ¾ cups granulated sugar
• 4 large eggs
• 1 tbsp vanilla extract
• 1 cup buttermilk (or whole milk + 1 tbsp lemon juice)
For the Buttercream:
• 1 cup unsalted butter, room temp
• 4 cups powdered sugar
• 2 tsp vanilla extract
• 2–3 tbsp heavy cream or milk
• Pinch of salt
For the Surprise Center
• 1–1½ cups pink or blue candies, sprinkles, or colored frosting
(M&M’s, mini marshmallows, or natural options like freeze-dried berries work too)
How to Make a Gender Reveal Cake (Step-by-Step)
• Step 1: Make the Batter
Start by preheating your oven to 350°F (175°C). Grease and line three 8-inch round cake pans. In one bowl, combine flour, baking powder, baking soda, and salt. In another, beat the butter and sugar until it’s pale and fluffy—about 3–4 minutes with a mixer. Add the eggs one at a time, then mix in the vanilla. Alternate adding the dry mix and the buttermilk until it’s all combined and smooth. Don’t overmix.

• Step 2: Bake and Cool
Divide your batter evenly between the prepared pans so each layer bakes uniformly. Place them in the oven and bake for 22–25 minutes, or until a toothpick inserted in the center comes out clean.
Once baked, let the cakes rest in their pans for 10 minutes—this helps them set and makes them easier to remove. Then carefully transfer the layers to wire racks to cool completely before assembling and decorating. Cooling fully ensures your frosting won’t melt and your layers stay neat and level.

• Step 3: Cut and Fill the Center
Use a round cookie cutter or a knife to cut a 3-inch hole in the middle of two of the layers. Leave the top one whole. Stack one cut-out layer on a cake board or plate. Add a ring of buttercream around the cutout and stack the second cut-out layer on top. Fill the hole with your chosen candies or filling—pink or blue. Keep it level with the top of the cutout. Then place the uncut cake layer on top and gently press down.
• Step 4: Make the Frosting
Use a round cookie cutter or a knife to cut a 3-inch hole in the middle of two of the layers. Leave the top one whole. Stack one cut-out layer on a cake board or plate. Add a ring of buttercream around the cutout and stack the second cut-out layer on top. Fill the hole with your chosen candies or filling—pink or blue. Keep it level with the top of the cutout. Then place the uncut cake layer on top and gently press down.

•
Step 5: Frost and Decorate
Spread a thin crumb coat of frosting over the cake and chill for 20–30 minutes. This locks in the crumbs. Then apply your final layer of frosting. Smooth it out or get creative—add piping, sprinkles, or a cute topper. Keep the outside neutral to keep the surprise sealed until you slice.
Little Secrets, Big Flavor
❃ Chill before frosting: Always let your cake cool completely in the fridge before you start frosting. Cold cake is much easier to work with, meaning less mess, cleaner edges, and a smoother finish.
❃ Level the layers: If your cakes domed while baking, trim the tops with a serrated knife so each layer is flat. Level layers stack better and give your reveal cake a polished, professional look.
❃ Test the fill amount: When adding the colored filling for the reveal, don’t overpack it. Too much filling can cause the cake to bulge or spill out when sliced. Aim for a generous but controlled layer for the perfect surprise.
❃ Use gel food coloring for intensity: Want vibrant pink, blue, or any color? Gel-based colors give bold, true tones without watering down your cake or frosting. A little goes a long way.
❃ Short on time? Box mixes work just fine. Just make sure to bake three layers and follow the same assembly and layering steps. You’ll get the same impressive look and fun reveal without extra effort.
Everything You’re Probably Wondering Right Now
Can I make this cake ahead of time?
Absolutely! You can bake the cake layers up to 2 days in advance. Wrap each layer tightly in plastic wrap to keep them fresh and refrigerate. Assemble and frost the cake the day before your event for the best results. This prep-ahead approach saves stress on the big day and lets you focus on the fun reveal.
What’s the best candy for the center?
Mini M&M’s, sprinkles, Skittles, jelly beans, or even colored coconut all work beautifully. Pick candies or small treats that match your theme or color scheme. Just make sure they’re small enough to fit nicely in the hollowed center without bulging the layers.
How should I store leftovers?
Cover the cake lightly with plastic wrap or in an airtight container and refrigerate for up to 4 days. Before serving again, let it sit at room temperature for about 30 minutes so the cake and frosting regain their soft, creamy texture.
Can I make it gluten-free or vegan?
Yes! You’ll need to swap the flour, butter, eggs, and milk for reliable alternatives. Gluten-free flours and plant-based milks or butter work well, though the texture may be slightly different. The colorful reveal effect will remain just as fun and impressive.
That’s All for Now—Until You Make It Again
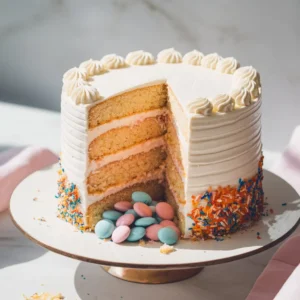
That’s how you make a perfect Gender Reveal Cake — simple, classic, and guaranteed to get that “wow” moment when you cut into it. The beauty is in its surprise, but the flavor holds its own too: soft vanilla layers, creamy frosting, and that pop of color inside. Whether you’re hosting the big reveal or baking it as a gift, this cake makes the moment unforgettable.
You may also like my:
❃ Snickerdoodle Cheesecake Recipe: No-Bake Magic in Every Bite
❃ Easy Gluten Free Carrot Cake Cheesecake Bars (3 Layers!)
❃ Fluffy Japanese Souffle Pancakes in 30 Minutes (Jiggly & Easy)
❃ Fudgy Cheesecake Swirl Brownies (The Easy Recipe You Need Now)
Save this recipe on Pinterest so you can easily find it when it’s your turn to bake up the big surprise!
Gender Reveal Cake
Ingredients
- 2 ½ cups all-purpose flour
- 2 ½ tsp baking powder
- ½ tsp salt
- 1 cup unsalted butter softened
- 1 ¾ cups granulated sugar
- 4 large eggs
- 1 tbsp vanilla extract
- 1 cup whole milk
- Pink or blue gel food coloring
- Buttercream frosting for assembly
- Sprinkles optional, for decoration
Instructions
- Preheat oven to 350°F (175°C). Grease and line three 8-inch round pans.
- In one bowl, whisk flour, baking powder, and salt.
- In another, cream butter and sugar until light and fluffy.
- Beat in eggs and vanilla. Add dry ingredients alternately with milk until smooth.
- Tint one portion with food coloring and bake each layer until golden.
- Cool completely. Stack and frost with buttercream.
- Slice to reveal the surprise color inside.